ははあ。なんスか、コレ。
AllSeen Alliance
投稿日:
オッサンは生きている。
 昨日試した「
……しんどいからやらないけど。……けど、やりたいなあ。……「Media Tomb」とかRaspberry Piに入れとけば、自宅のテレビでDLNA経由で見る、とかも一気に可能だわ。
問題は、3.3Vロジックだったりするのが扱いづらいんだよなー……。もし、昨日みたいに超音波センサなんか付けようとすると、途端にひと苦労するもんな。5Vの3端子レギュレータを別建て、センサの入力も結構一苦労して読まなくちゃならん。あと、アナログ入れるのが難しい。金をかければ、プラグインみたいなものはいくらでもあるだろうとは思うんだけど……。
このところRaspberry Piで遊んでみて思うことは、
「Raspberry Piはデジタルとモノとネットを融合させる、Makersのための、クリエイティブで楽しい魔法の弾丸だ!」
……ではなくて、
「一時代終わってしまったUNIX爺ィがまったりとUNIXがらみで楽しめるオモチャ」
……のような気がそこはかとなくする、ということであるが、多分、そんなことを書くと、ボロカスにいじめられてしまうのだろうなあ。
人生、無常である。「無常」と「無情」は、音は同じだが漢字は違うんですぜ、ダンナw。
Raspberry PiにAD変換ICをつないで遊んでいたわけであるが、ふと「3.3Vを12ビットでAD変換すると、結局1ティック何Vかいな」なぞと計算したくもなる。
たまたまUNIXのコマンドラインにいたら、普通、
# echo 'scale=20;3.3/4096' | bc
……とかやると思うんだけど、ところが、Ruspberry Piには、「bc」がデフォルトでは入ってないのである。
うーむ。bc入れとかなアカンがな、アンタ。世の中のUNIX爺ィがみんな怒りまっせ。
と、いうわけで、
toshio@satoraspi:/var/www$ sudo apt-get install bc
パッケージリストを読み込んでいます... 完了
依存関係ツリーを作成しています
状態情報を読み取っています... 完了
以下のパッケージが新たにインストールされます:
  bc
アップグレード: 0 個、新規インストール: 1 個、削除: 0 個、保留: 0 個。
106 kB のアーカイブを取得する必要があります。
この操作後に追加で 257 kB のディスク容量が消費されます。
取得:1 http://mirrordirector.raspbian.org/raspbian/ wheezy/main bc armhf 1.06.95-2 [106 kB]
106 kB を 1秒 で取得しました (78.0 kB/s)
以前に未選択のパッケージ bc を選択しています。
(データベースを読み込んでいます ... 現在 79298 個のファイルとディレクトリがインストールされています。)
(.../bc_1.06.95-2_armhf.deb から) bc を展開しています...
menu のトリガを処理しています ...
install-info のトリガを処理しています ...
man-db のトリガを処理しています ...
bc (1.06.95-2) を設定しています ...
menu のトリガを処理しています ...
toshio@satoraspi:/var/www$
……とかやるんでしょうね。
で、まことに平和な、オッサンがやりたい計算が可能になる。
toshio@satoraspi:/var/www$ echo 'scale=20;3.3/4096' | bc
.00080566406250000000
toshio@satoraspi:/var/www$
1ティック0.81mVと思えば、まあ、間違いのないところであるようだ。
以前、Arduinoのアナログ入力にサーミスタをつなぎ、温度計にして遊んだ。最近はLCDディスプレイに温度を表示してみたり、なかなか面白い。
一方、Raspberry PiはWebによくなじむ。ApacheもPHPも走る。
 それで、先週宮城大学小島研究室のサイトで公開しておられるADCアクセスのためのソースコードを拝借して遊んだが、これを使ってWeb温度計にしてみた。
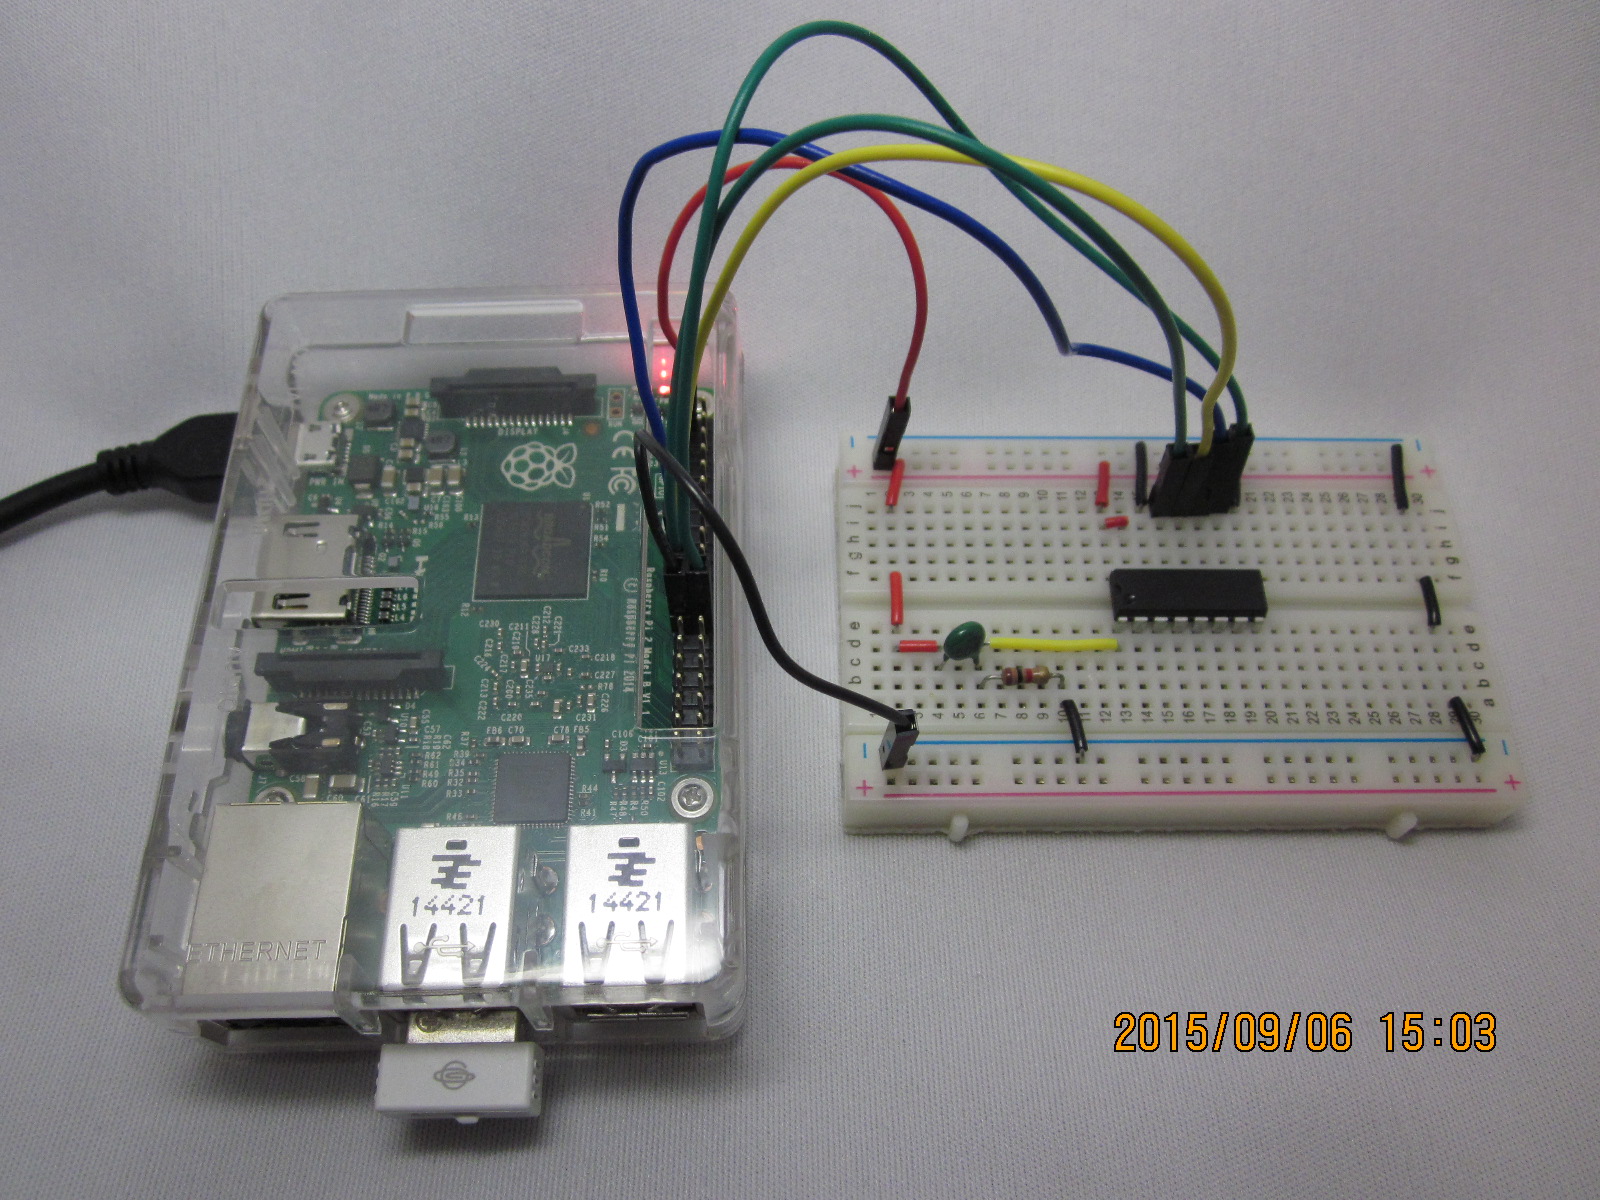
まず、ブレッドボードにAD変換ICのMCP3208と、サーミスタ、分圧用の抵抗1kΩを置き、適切に配線する。これには、以前Arduinoで遊ぶために買った「Seeedstudio Arduino Sidekick Basic Kit」に入っていたMF11-503Kというサーミスタをそのまま使う。
それから、C++でこんなプログラムを書く。先週も書いたが、宮城大学小島研究室のサイトで公開しておられるコードは、Raspberry Pi 1では何の支障もなく動くが、Raspberry Pi 2 Model Bではそのままでは動かない。一部の型キャストなどを変更する必要がある。それについては先週のエントリで記してある。
//
//    tempMesure.cpp
//      佐藤俊夫
//      Sun Sep  6 13:57:53 JST 2015
//      サーミスタMF11-503Kと1kΩ抵抗を直列につなぎ、3.3Vを印加して、
//      その間から分圧をとって温度を測る。
//      宮城大学小島研究室でウェブ公開しておられるソースコードを拝借した。
//      コンパイル
//        cc -lm tempMesure.cpp raspSPI.o raspADC.o -o tempMesure
//
#include <stdio.h>
#include <math.h>
#include "raspADC.h"

#define ADC_CHIP  ADC_3208
float tempMesure(int srcVal);

int main() {
  ADC adc;

  adc.init("/dev/spidev0.1", ADC_CHIP);
  printf("%2.2f\n", tempMesure(adc.get(0)));
}

float tempMesure(int srcVal){
  const float B = 4350.0, Ta = 25.0, Rt0 = 50000.0;  //  MF11-503Kスペックシート記載
  const float K = 273.15;  //  熱力学温度の定数
  const float v0 = 3.3, r0 = 1000.0;  //  Arduino +5Vと電流調整抵抗1kΩ
  const int resolution = 4096;  //  アナログ入力の分解能
  float vt = 0.0, rt = 0.0;

  vt = srcVal * (v0 / (resolution - 1));
  rt = (v0 * r0 - vt * r0) / vt;
  return(1.0 / (log(rt / Rt0) / B + 1.0 / (Ta + K)) - K);
}
これは単に、サーミスタで計った現在の温度を標準出力に書くだけだ。
これを「popen();」で開けば、PHPで読める。簡単である。
<html>
 <head>
  <meta name="Editor" content="vim">
  <meta http-equiv="Content-Type" content="text/html;charset=utf-8">
  <link rel="icon" href="favicon.ico" type="image/x-icon" />
  <link rel="Shortcut Icon" type="image/x-icon" href="favicon.ico" />
  <title>PHPで温度計</title>
  <meta http-equiv="Keyword" content="佐藤俊夫, 佐藤, 俊夫, SATOTOSHIO, SatoToshio, sato, toshio, Raspberry Pi, Raspberry Pi 2 Model B">
 </head>
 <body bgcolor="#888888">
<body>
  <center>
  <h1><img src="raspberry_pi.png" width="50px" align="middle"/>Raspberry Pi + PHPで温度計</h1>
  <hr>
  </center>
<?
ini_set( 'display_errors', 1 );
$process = popen("sudo /home/toshio/SPI_ADC/tempMesure", "r");
$temp = fgets($process);
?>
<center>
<table border=1 width="120px">
<tr> <th>0</th><th>10</th> <th>20</th> <th>30</th> <th>40</th> <th>50</th> <th>60</th></tr>
<tr><td colspan = 7>
<table>
<tr>
<td bgcolor="red" width="<?print $temp * 2?>px"><?print $temp?>℃</td&t;</tr></table>
</tr>
</table>
</td></tr></tr></table>
</center>
</body>
</html>
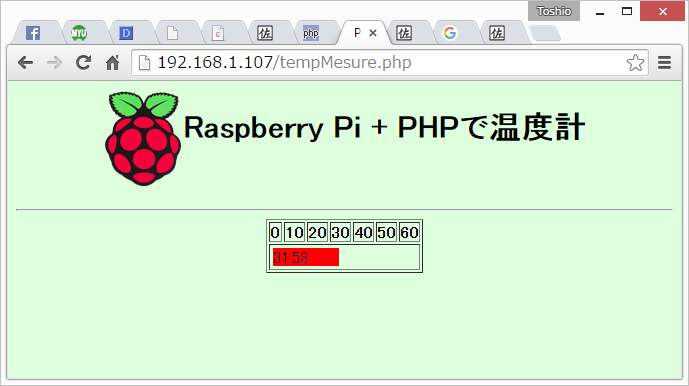
テーブルの幅を温度計のアルコール柱に見立てて、赤い帯で表すようにしてみた。
Arduinoでも同じようなことはできるが、Arduinoで難しいのは、こういうふうに、無駄に画像を配置したり、少し分量の多いHTMLを書いたりすることだ。だが、こんなことはRaspberry Piには造作もなくできてしまう。
反面、Arduinoはアナログ入力が直接可能だが、Raspberry Piで同じことをしようとすると、アナログ入力にAD変換ICを準備し、これとの通信にもいろいろと研究の上で取り組む必要がある。簡単で刺激的な目的のために少しプロトタイピングをしてみようと考えている多くのクリエイターがなしうるところではない。
入門書籍「Raspberry Piをはじめよう」にもそうしたことが少し書かれてある。
エディタはやっぱりviでないと、私ごときオッサンは調子が出ないのである。
Raspberry Piでvisudoすると、なぜか、viでもemacsでもない、nanoとかいう知らんエディタが立ち上がるので、不満なのだ。
debian系ディストリビューションでは、どうやら、「update-alternatives」というコマンドでこれを切り替えられるということを知った。
root@satoraspi:~# update-alternatives --config editor
alternative editor (/usr/bin/editor を提供) には 3 個の選択肢があります。

  選択肢    パス             優先度  状態
------------------------------------------------------------
* 0            /bin/nano           40        自動モード
  1            /bin/ed            -100       手動モード
  2            /bin/nano           40        手動モード
  3            /usr/bin/vim.tiny   10        手動モード

現在の選択 [*] を保持するには Enter、さもなければ選択肢の番号のキーを押してください: 3
update-alternatives: /usr/bin/editor (editor) を提供するために 手動モード で /usr/bin/vim.tiny を使います
root@satoraspi:~#
……とまあ、こんな感じだ。
 Raspberry Piは要するにLinuxマシンなので、ウェブサーバも選り取り見取りだ。単にウェブインターフェイスを備えたモノのプロトをするならArduinoのほうが手っ取り早いが、いかんせん、リッチなウェブ・コンテンツをArduino+ETHERNET SHIELD 2でサービスするのは難しく、不可能ではないにもせよ、ウェブ・コンテンツに写真を置くなどというのはほとんど無理であった。
Raspberry Piはコンピュータ・パワーが大きいから、大きなウェブ・コンテンツも本体内に飲み込んでしまえる。
そこで、である。Raspberry Piで遊ぶのに、なにも世間の教科書通りにPythonやRubyの作例を打ち込むだけが能ではない。CだってC++だって、PerlだってPHPだって動くはずである。SMTPもPOPもNTPも、なんだって動く。多分MySQLだのPostgreSQLだのも動くだろう。
Apacheをインストールして動かしてみよう。それから、PHPでGPIOを突っついてみよう。これは、PHPでハードウェアを動かすことにつながる。無駄に贅沢なWebインターフェイスでLチカ、というのも面白い。
まず、今起動しているモノを確認してみよう。RedHat系のLinux、Fedoraなどはこういう時に「chkconfig –list」などとするが、Raspberry Piに入っているのは「Raspbian」だ。RaspbianはDebian系のディストリビューションなので、chkconfigはない。
私はUNIX育ちのオッサンで、SVR4.2の管理人を長年やっきた。Linuxに関してはフリー時代のRedHat(4~9ぐらいまで)、それ以降はずっとFedora Coreを使ってきたので、Debianは良く知らないのである。ま、これも機会だから、ちょっと体験してみようではないの。
ネット情報によると「insserv」「update-rc.d」「sysv-rc-conf」「rcconf」「upstart」などがあるという。
# insserv -s
K:01:0 1 6:triggerhappy
K:07:0 6:umountfs
K:04:0 6:umountnfs.sh
K:02:0 6:sendsigs
K:01:0 6:plymouth
K:03:0 1 6:rsyslog
K:06:0 6 S:hwclock.sh
K:01:0 1 6:alsa-utils
K:06:0 6:networking
K:05:0 1 2 3 4 5 6 S:rpcbind
K:05:0 1 2 3 4 5 6 S:nfs-common
K:01:0 6:urandom
K:01:0 1 6:avahi-daemon
K:01:0 1 6:dhcpcd
K:01:0 1 6:cgroup-bin
K:08:0 6:umountroot
K:09:0:halt
K:09:6:reboot
K:01:0 1 6:fake-hwclock
K:01:0 1 2 6:lightdm
K:01:0 1 6:ifplugd
S:02:S:udev
S:03:S:keyboard-setup
S:15:S:console-setup
S:01:2 3 4 5:triggerhappy
S:08:S:mountall.sh
S:09:S:mountall-bootclean.sh
S:12:S:mountnfs.sh
S:13:S:mountnfs-bootclean.sh
S:04:2 3 4 5:plymouth
S:01:2 3 4 5:rsyslog
S:16:S:alsa-utils
S:11:S:networking
S:10:S:urandom
S:04:S:mountdevsubfs.sh
S:05:S:checkroot.sh
S:03:2 3 4 5:avahi-daemon
S:02:2 3 4 5:dbus
S:01:2 3 4 5:dhcpcd
S:01:2 3 4 5:cgroup-bin
S:01:S:mountkernfs.sh
S:01:S:fake-hwclock
S:03:3 4 5:lightdm
S:16:S:x11-common
S:14:S:kbd
S:01:2 3 4 5:ifplugd
S:02:1:single
S:01:1:killprocs
S:01:1 2 3 4 5:bootlogs
S:01:S:hostname.sh
S:01:1 2 3 4 5:motd
S:02:2 3 4 5:dphys-swapfile
S:04:2 3 4 5:rc.local
S:04:2 3 4 5:rmnologin
S:02:2 3 4 5:cron
S:02:2 3 4 5:rsync
S:02:2 3 4 5:ssh
S:02:2 3 4 5:ntp
S:01:2 3 4 5:sudo
S:16:S:raspi-config
S:10:S:udev-mtab
S:06:S:checkroot-bootclean.sh
S:16:S:bootmisc.sh
S:06:S:kmod
S:16:S:plymouth-log
S:07:S:checkfs.sh
S:06:S:mtab.sh
S:10:S:procps
ほほー、なるほど、コレは多分、左から現状(StartかKillか)、起動順、起動すべきRun-Levelのリスト、サービス名、だろうなあ。はて、S、Kじゃないほうの、Run-Levelの「S」は、なんだろ、と調べると、「起動順で一番はじめ、かつ、どのRun-Levelでも共通で起動」ということのようである。
で、
# insserv -s | egrep '(pache)|(ttp)'
#
なんてことをやっても、全然何も出ないから、デフォルトのRaspbianではhttpらしきものやApacheらしきものは何も動いていない。
それでは、というわけで、
# apt-get -s install apache2
パッケージリストを読み込んでいます... 完了
依存関係ツリーを作成しています
状態情報を読み取っています... 完了
以下の特別パッケージがインストールされます:
  apache2-mpm-worker apache2-utils apache2.2-bin apache2.2-common libapr1 libaprutil1
  libaprutil1-dbd-sqlite3 libaprutil1-ldap ssl-cert
提案パッケージ:
  apache2-doc apache2-suexec apache2-suexec-custom openssl-blacklist
以下のパッケージが新たにインストールされます:
  apache2 apache2-mpm-worker apache2-utils apache2.2-bin apache2.2-common libapr1
  libaprutil1 libaprutil1-dbd-sqlite3 libaprutil1-ldap ssl-cert
アップグレード: 0 個、新規インストール: 10 個、削除: 0 個、保留: 0 個。
Inst libapr1 (1.4.6-3+deb7u1 Raspbian:7.0/oldstable [armhf])
Inst libaprutil1 (1.4.1-3 Raspbian:7.0/oldstable [armhf])
Inst libaprutil1-dbd-sqlite3 (1.4.1-3 Raspbian:7.0/oldstable [armhf])
Inst libaprutil1-ldap (1.4.1-3 Raspbian:7.0/oldstable [armhf])
Inst apache2.2-bin (2.2.22-13+deb7u6 Raspbian:7.0/oldstable [armhf])
Inst apache2-utils (2.2.22-13+deb7u6 Raspbian:7.0/oldstable [armhf])
Inst apache2.2-common (2.2.22-13+deb7u6 Raspbian:7.0/oldstable [armhf])
Inst apache2-mpm-worker (2.2.22-13+deb7u6 Raspbian:7.0/oldstable [armhf])
Inst apache2 (2.2.22-13+deb7u6 Raspbian:7.0/oldstable [armhf])
Inst ssl-cert (1.0.32 Raspbian:7.0/oldstable [all])
Conf libapr1 (1.4.6-3+deb7u1 Raspbian:7.0/oldstable [armhf])
Conf libaprutil1 (1.4.1-3 Raspbian:7.0/oldstable [armhf])
Conf libaprutil1-dbd-sqlite3 (1.4.1-3 Raspbian:7.0/oldstable [armhf])
Conf libaprutil1-ldap (1.4.1-3 Raspbian:7.0/oldstable [armhf])
Conf apache2.2-bin (2.2.22-13+deb7u6 Raspbian:7.0/oldstable [armhf])
Conf apache2-utils (2.2.22-13+deb7u6 Raspbian:7.0/oldstable [armhf])
Conf apache2.2-common (2.2.22-13+deb7u6 Raspbian:7.0/oldstable [armhf])
Conf apache2-mpm-worker (2.2.22-13+deb7u6 Raspbian:7.0/oldstable [armhf])
Conf apache2 (2.2.22-13+deb7u6 Raspbian:7.0/oldstable [armhf])
Conf ssl-cert (1.0.32 Raspbian:7.0/oldstable [all])
#
特に問題なさそうだな、というわけで……
# apt-get install apache2
パッケージリストを読み込んでいます... 完了
依存関係ツリーを作成しています
状態情報を読み取っています... 完了
以下の特別パッケージがインストールされます:
  apache2-mpm-worker apache2-utils apache2.2-bin apache2.2-common libapr1 libaprutil1
  libaprutil1-dbd-sqlite3 libaprutil1-ldap ssl-cert
提案パッケージ:
  apache2-doc apache2-suexec apache2-suexec-custom openssl-blacklist
以下のパッケージが新たにインストールされます:
  apache2 apache2-mpm-worker apache2-utils apache2.2-bin apache2.2-common libapr1
  libaprutil1 libaprutil1-dbd-sqlite3 libaprutil1-ldap ssl-cert
アップグレード: 0 個、新規インストール: 10 個、削除: 0 個、保留: 0 個。
1,356 kB のアーカイブを取得する必要があります。
この操作後に追加で 4,585 kB のディスク容量が消費されます。
続行しますか [Y/n]? y
取得:1 http://mirrordirector.raspbian.org/raspbian/ wheezy/main libapr1 armhf 1.4.6-3+deb7u1 [90.9 kB]
取得:2 http://mirrordirector.raspbian.org/raspbian/ wheezy/main libaprutil1 armhf 1.4.1-3 [77.1 kB]
取得:3 http://mirrordirector.raspbian.org/raspbian/ wheezy/main libaprutil1-dbd-sqlite3 armhf 1.4.1-3 [17.2 kB]
取得:4 http://mirrordirector.raspbian.org/raspbian/ wheezy/main libaprutil1-ldap armhf 1.4.1-3 [16.0 kB]
取得:5 http://mirrordirector.raspbian.org/raspbian/ wheezy/main apache2.2-bin armhf 2.2.22-13+deb7u6 [676 kB]
取得:6 http://mirrordirector.raspbian.org/raspbian/ wheezy/main apache2-utils armhf 2.2.22-13+deb7u6 [163 kB]
取得:7 http://mirrordirector.raspbian.org/raspbian/ wheezy/main apache2.2-common armhf 2.2.22-13+deb7u6 [292 kB]
取得:8 http://mirrordirector.raspbian.org/raspbian/ wheezy/main apache2-mpm-worker armhf 2.2.22-13+deb7u6 [2,238 B]
取得:9 http://mirrordirector.raspbian.org/raspbian/ wheezy/main apache2 armhf 2.2.22-13+deb7u6 [1,440 B]
取得:10 http://mirrordirector.raspbian.org/raspbian/ wheezy/main ssl-cert all 1.0.32 [19.5 kB]
1,356 kB を 4秒 で取得しました (281 kB/s)
パッケージを事前設定しています ...
以前に未選択のパッケージ libapr1 を選択しています。
(データベースを読み込んでいます ... 現在 78616 個のファイルとディレクトリがインストールされています。)
(.../libapr1_1.4.6-3+deb7u1_armhf.deb から) libapr1 を展開しています...
以前に未選択のパッケージ libaprutil1 を選択しています。
(.../libaprutil1_1.4.1-3_armhf.deb から) libaprutil1 を展開しています...
以前に未選択のパッケージ libaprutil1-dbd-sqlite3 を選択しています。
(.../libaprutil1-dbd-sqlite3_1.4.1-3_armhf.deb から) libaprutil1-dbd-sqlite3 を展開しています...
以前に未選択のパッケージ libaprutil1-ldap を選択しています。
(.../libaprutil1-ldap_1.4.1-3_armhf.deb から) libaprutil1-ldap を展開しています...
以前に未選択のパッケージ apache2.2-bin を選択しています。
(.../apache2.2-bin_2.2.22-13+deb7u6_armhf.deb から) apache2.2-bin を展開しています...
以前に未選択のパッケージ apache2-utils を選択しています。
(.../apache2-utils_2.2.22-13+deb7u6_armhf.deb から) apache2-utils を展開しています...
以前に未選択のパッケージ apache2.2-common を選択しています。
(.../apache2.2-common_2.2.22-13+deb7u6_armhf.deb から) apache2.2-common を展開しています...
以前に未選択のパッケージ apache2-mpm-worker を選択しています。
(.../apache2-mpm-worker_2.2.22-13+deb7u6_armhf.deb から) apache2-mpm-worker を展開していま す...
以前に未選択のパッケージ apache2 を選択しています。
(.../apache2_2.2.22-13+deb7u6_armhf.deb から) apache2 を展開しています...
以前に未選択のパッケージ ssl-cert を選択しています。
(.../ssl-cert_1.0.32_all.deb から) ssl-cert を展開しています...
man-db のトリガを処理しています ...
libapr1 (1.4.6-3+deb7u1) を設定しています ...
libaprutil1 (1.4.1-3) を設定しています ...
libaprutil1-dbd-sqlite3 (1.4.1-3) を設定しています ...
libaprutil1-ldap (1.4.1-3) を設定しています ...
apache2.2-bin (2.2.22-13+deb7u6) を設定しています ...
apache2-utils (2.2.22-13+deb7u6) を設定しています ...
apache2.2-common (2.2.22-13+deb7u6) を設定しています ...
Enabling site default.
Enabling module alias.
Enabling module autoindex.
Enabling module dir.
Enabling module env.
Enabling module mime.
Enabling module negotiation.
Enabling module setenvif.
Enabling module status.
Enabling module auth_basic.
Enabling module deflate.
Enabling module authz_default.
Enabling module authz_user.
Enabling module authz_groupfile.
Enabling module authn_file.
Enabling module authz_host.
Enabling module reqtimeout.
apache2-mpm-worker (2.2.22-13+deb7u6) を設定しています ...
[....] Starting web server: apache2apache2: Could not reliably determine the server's fully qualified domain name, using 127.0.1.1 for ServerName
. ok
apache2 (2.2.22-13+deb7u6) を設定しています ...
ssl-cert (1.0.32) を設定しています ...
#
なんてことなく終わる。
次に、
# insserv -s | egrep '(pache)|(ttp)'
K:01:0 1 6:apache2
S:02:2 3 4 5:apache2
#
……ぬぅ、StartなのかKillなのか、どっちやねん、というわけで、ブラウザにアドレスを入れてみると、

……と、普通にApacheは動いている。KとS両方出るのは、起動順が01、02となっていることから、Run-Level 0、1、6ではどうあろうと強制終了し、改めて2、3、4、5では起動、ということであろうか。
えーっと、自動起動のほうはこれでいいから、サービスの起動停止のテストは……、と。
# /etc/init.d/apache2 stop
[....] Stopping web server: apache2apache2: Could not reliably determine the server's fully qualified domain name, using 127.0.1.1 for ServerName
[ ok waiting ..
root@satoraspi:~# /etc/init.d/apache2 start
[....] Starting web server: apache2apache2: Could not reliably determine the server's fully qualified domain name, using 127.0.1.1 for ServerName
. ok
#
ふむ、だいだい動いとる。
とりあえず、indexだけ、かっこよくしておこう。えーっと、ドキュメントルートはどこかいな、と。
# ls -Fla /etc/ | egrep '(http)|(apache)'
drwxr-xr-x   7 root root    4096  8月 30 09:01 apache2/
root@satoraspi:~# ls /etc/apache2
apache2.conf  envvars  mods-available  ports.conf       sites-enabled
conf.d        magic    mods-enabled    sites-available
# cd /etc/apache2
# grep 'DocumentRoot' */*
sites-available/default:        DocumentRoot /var/www
sites-available/default-ssl:    DocumentRoot /var/www
sites-enabled/000-default:      DocumentRoot /var/www
……と、いうわけで普通に「/var/www」の下じゃのう。普通のユーザに戻って、
toshio@satoraspi:~$ cd /var/www
toshio@satoraspi:/var/www$ ls -Fla
合計 12
drwxr-xr-x  2 root root 4096  8月 30 09:01 ./
drwxr-xr-x 12 root root 4096  8月 30 09:01 ../
-rw-r--r--  1 root root  177  8月 30 09:01 index.html
toshio@satoraspi:/var/www$ cat index.html
<html><body><h1>It works!</h1>
<p>This is the default web page for this server.</p>
<p>The web server software is running but no content has been added, yet.</p>
</body></html>toshio@satoraspi:/var/www$
はあ、さっきブラウザに出てたヤツでんな、と。
一応残しておいて……
toshio@satoraspi:/var/www$ sudo cp index.html .index.html.ORG
[sudo] password for toshio:
toshio@satoraspi:/var/www$ sudo chown toshio:pi index.html
toshio@satoraspi:/var/www$ ls -Fla
合計 16
drwxr-xr-x  2 root   root 4096  8月 30 09:37 ./
drwxr-xr-x 12 root   root 4096  8月 30 09:01 ../
-rw-r--r--  1 root   root  177  8月 30 09:37 .index.html.ORG
-rw-r--r--  1 toshio pi    177  8月 30 09:01 index.html
toshio@satoraspi:/var/www$cd ..
toshio@satoraspi:/var$sudo chown toshio:pi www
toshio@satoraspi:/var$cd www
toshio@satoraspi:/var/www$vi index.html
んで、ばーっ、って、書くですよ。
<html>
<head>
<meta name="Editor" content="vim">
<meta http-equiv="Content-Type" content="text/html;charset=utf-8">
<link rel="icon" href="favicon.ico" type="image/x-icon" />
<link rel="Shortcut Icon" type="image/x-icon" href="favicon.ico" />
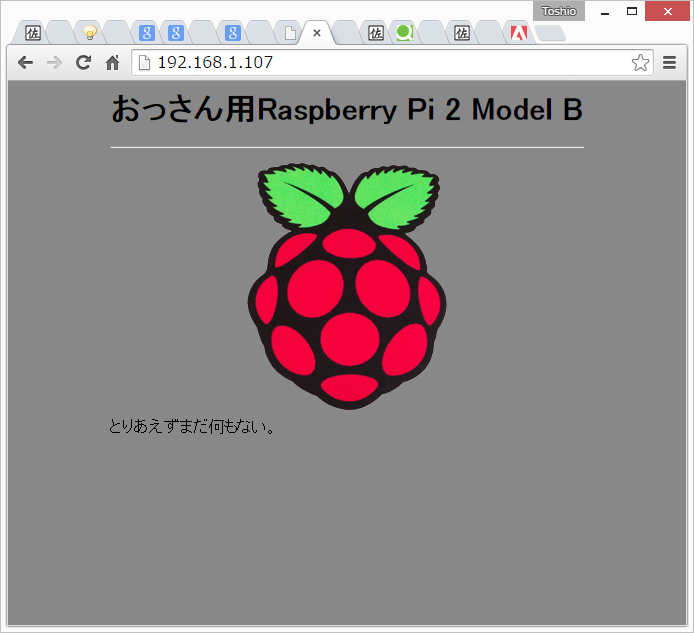
<title>おっさん用Raspberry Pi 2 Model B</title>
<meta http-equiv="Keyword" content="佐藤俊夫, 佐藤, 俊夫, SATOTOSHIO, SatoToshio, sato, toshio, Raspberry Pi, Raspberry Pi 2 Model B">
</head>
<body bgcolor="#888888">
<basefont size=4">
<center>
<table>
<tr>
<td>
<h1>おっさん用Raspberry Pi 2 Model B</h1>
<hr>
<center><img src="raspberry_pi.png"></center>
</td>
</tr>
<tr>
<td>
とりあえずまだ何もない。
</td>
</tr>
</table>
</center>
</body>
</html>
んで、画像なんかをSCPでコピーして、まずはこんなindex.htmlですな。
それにしても、こんな、5千円かそこらのシングルボードでapache2のウェブサービスができるなんて、隔世の感があるな。
さておき、続いてPHPを入れよう。
toshio@satoraspi:/var/www$ cd
toshio@satoraspi:~$ su -
パスワード:
root@satoraspi:~# apt-cache search php5
dwoo - PHP5 template engine
libapache2-mod-php5 - server-side, HTML-embedded scripting language (Apache 2 module)
libapache2-mod-php5filter - server-side, HTML-embedded scripting language (apache 2 filter module)
libexpect-php5 - expect module for PHP 5
libgv-php5 - PHP5 bindings for graphviz
libkohana2-modules-php - lightweight PHP5 MVC framework (extension modules)
libkohana2-php - lightweight PHP5 MVC framework
libkohana3.1-core-php - PHP5 framework core classes
libkohana3.1-php - PHP5 framework metapackage
libkohana3.2-core-php - PHP5 framework core classes
libkohana3.2-php - PHP5 framework metapackage
libow-php5 - Dallas 1-wire support: PHP5 bindings
libphp-jpgraph - Object oriented graph library for php5
libphp-jpgraph-examples - Object oriented graph library for php5 (examples)
libphp5-embed - HTML-embedded scripting language (Embedded SAPI library)
php-doc - Documentation for PHP5
php-imlib - PHP Imlib2 Extension
php5 - server-side, HTML-embedded scripting language (metapackage)
php5-adodb - Extension optimising the ADOdb database abstraction library
php5-cgi - server-side, HTML-embedded scripting language (CGI binary)
php5-cli - command-line interpreter for the php5 scripting language
php5-common - Common files for packages built from the php5 source
php5-curl - CURL module for php5
php5-dbg - Debug symbols for PHP5
php5-dev - Files for PHP5 module development
php5-enchant - Enchant module for php5
php5-exactimage - fast image manipulation library (PHP bindings)
php5-ffmpeg - audio and video support via ffmpeg for php5
php5-fpm - server-side, HTML-embedded scripting language (FPM-CGI binary)
php5-gd - GD module for php5
php5-gdcm - Grassroots DICOM PHP5 bindings
php5-geoip - GeoIP module for php5
php5-gmp - GMP module for php5
php5-imagick - ImageMagick module for php5
php5-imap - IMAP module for php5
php5-interbase - interbase/firebird module for php5
php5-intl - internationalisation module for php5
php5-lasso - Library for Liberty Alliance and SAML protocols - PHP 5 bindings
php5-ldap - LDAP module for php5
php5-librdf - PHP5 language bindings for the Redland RDF library
php5-mapscript - php5-cgi module for MapServer
php5-mcrypt - MCrypt module for php5
php5-memcache - memcache extension module for PHP5
php5-memcached - memcached extension module for PHP5, uses libmemcached
php5-midgard2 - Midgard2 Content Repository - PHP5 language bindings and module
php5-ming - Ming module for php5
php5-mysql - MySQL module for php5
php5-mysqlnd - MySQL module for php5 (Native Driver)
php5-odbc - ODBC module for php5
php5-pgsql - PostgreSQL module for php5
php5-ps - ps module for PHP 5
php5-pspell - pspell module for php5
php5-radius - PECL radius module for PHP 5
php5-recode - recode module for php5
php5-remctl - PECL module for Kerberos-authenticated command execution
php5-rrd - rrd module for PHP 5
php5-sasl - Cyrus SASL extension for PHP 5
php5-snmp - SNMP module for php5
php5-sqlite - SQLite module for php5
php5-svn - PHP Bindings for the Subversion Revision control system
php5-sybase - Sybase / MS SQL Server module for php5
php5-tidy - tidy module for php5
php5-tokyo-tyrant - PHP interface to Tokyo Cabinet's network interface, Tokyo Tyrant
php5-vtkgdcm - Grassroots DICOM VTK PHP bindings
php5-xcache - Fast, stable PHP opcode cacher
php5-xdebug - Xdebug Module for PHP 5
php5-xmlrpc - XML-RPC module for php5
php5-xsl - XSL module for php5
phpunit - Unit testing suite for PHP5
root@satoraspi:~#
はあ、いっぱい出たけど、要するにPHP5があるんだよな。うん、うん。
root@satoraspi:~# apt-get -s install php5
パッケージリストを読み込んでいます... 完了
依存関係ツリーを作成しています
状態情報を読み取っています... 完了
以下の特別パッケージがインストールされます:
  apache2-mpm-prefork libapache2-mod-php5 libonig2 libqdbm14 lsof php5-cli php5-common
提案パッケージ:
  php-pear
以下のパッケージは「削除」されます:
  apache2-mpm-worker
以下のパッケージが新たにインストールされます:
  apache2-mpm-prefork libapache2-mod-php5 libonig2 libqdbm14 lsof php5 php5-cli
  php5-common
アップグレード: 0 個、新規インストール: 8 個、削除: 1 個、保留: 0 個。
Remv apache2-mpm-worker [2.2.22-13+deb7u6] [apache2:armhf ]
Inst apache2-mpm-prefork (2.2.22-13+deb7u6 Raspbian:7.0/oldstable [armhf])
Conf apache2-mpm-prefork (2.2.22-13+deb7u6 Raspbian:7.0/oldstable [armhf])
Inst lsof (4.86+dfsg-1 Raspbian:7.0/oldstable [armhf])
Inst php5-common (5.4.44-0+deb7u1 Raspbian:7.0/oldstable [armhf])
Inst libonig2 (5.9.1-1 Raspbian:7.0/oldstable [armhf])
Inst libqdbm14 (1.8.78-2 Raspbian:7.0/oldstable [armhf])
Inst libapache2-mod-php5 (5.4.44-0+deb7u1 Raspbian:7.0/oldstable [armhf])
Inst php5 (5.4.44-0+deb7u1 Raspbian:7.0/oldstable [all])
Inst php5-cli (5.4.44-0+deb7u1 Raspbian:7.0/oldstable [armhf])
Conf lsof (4.86+dfsg-1 Raspbian:7.0/oldstable [armhf])
Conf php5-common (5.4.44-0+deb7u1 Raspbian:7.0/oldstable [armhf])
Conf libonig2 (5.9.1-1 Raspbian:7.0/oldstable [armhf])
Conf libqdbm14 (1.8.78-2 Raspbian:7.0/oldstable [armhf])
Conf libapache2-mod-php5 (5.4.44-0+deb7u1 Raspbian:7.0/oldstable [armhf])
Conf php5 (5.4.44-0+deb7u1 Raspbian:7.0/oldstable [all])
Conf php5-cli (5.4.44-0+deb7u1 Raspbian:7.0/oldstable [armhf])
root@satoraspi:~#
入れても大丈夫みたいだ。
root@satoraspi:~# apt-get  install php5
パッケージリストを読み込んでいます... 完了
依存関係ツリーを作成しています
状態情報を読み取っています... 完了
以下の特別パッケージがインストールされます:
  apache2-mpm-prefork libapache2-mod-php5 libonig2 libqdbm14 lsof php5-cli php5-common
提案パッケージ:
  php-pear
以下のパッケージは「削除」されます:
  apache2-mpm-worker
以下のパッケージが新たにインストールされます:
  apache2-mpm-prefork libapache2-mod-php5 libonig2 libqdbm14 lsof php5 php5-cli
  php5-common
アップグレード: 0 個、新規インストール: 8 個、削除: 1 個、保留: 0 個。
6,142 kB のアーカイブを取得する必要があります。
この操作後に追加で 17.3 MB のディスク容量が消費されます。
続行しますか [Y/n]? y
取得:1 http://mirrordirector.raspbian.org/raspbian/ wheezy/main apache2-mpm-prefork armhf 2.2.22-13+deb7u6 [2,342 B]
取得:2 http://mirrordirector.raspbian.org/raspbian/ wheezy/main lsof armhf 4.86+dfsg-1 [321 kB]
取得:3 http://mirrordirector.raspbian.org/raspbian/ wheezy/main php5-common armhf 5.4.44-0+deb7u1 [621 kB]
取得:4 http://mirrordirector.raspbian.org/raspbian/ wheezy/main libonig2 armhf 5.9.1-1 [130 kB]
取得:5 http://mirrordirector.raspbian.org/raspbian/ wheezy/main libqdbm14 armhf 1.8.78-2 [119 kB]
取得:6 http://mirrordirector.raspbian.org/raspbian/ wheezy/main libapache2-mod-php5 armhf 5.4.44-0+deb7u1 [2,479 kB]
取得:7 http://mirrordirector.raspbian.org/raspbian/ wheezy/main php5 all 5.4.44-0+deb7u1 [1,024 B]
取得:8 http://mirrordirector.raspbian.org/raspbian/ wheezy/main php5-cli armhf 5.4.44-0+deb7u1 [2,469 kB]
6,142 kB を 6秒 で取得しました (1,016 kB/s)
dpkg: apache2-mpm-worker: 依存関係に問題があります。しかし要求に従い削除しています:
 apache2 は以下に依存 (depends) します: apache2-mpm-worker (= 2.2.22-13+deb7u6) | apache2-mpm-prefork (= 2.2.22-13+deb7u6) | apache2-mpm-event (= 2.2.22-13+deb7u6) | apache2-mpm-itk (= 2.2.22-13+deb7u6) ...しかし:
  パッケージ apache2-mpm-worker は削除されようとしています。
  パッケージ apache2-mpm-prefork はまだインストールされていません。
  パッケージ apache2-mpm-event はまだインストールされていません。
  パッケージ apache2-mpm-itk はまだインストールされていません。

(データベースを読み込んでいます ... 現在 79208 個のファイルとディレクトリがインストールされています。)
apache2-mpm-worker を削除しています ...
[....] Stopping web server: apache2apache2: Could not reliably determine the server's fully qualified domain name, using 127.0.1.1 for ServerName
[ ok waiting ..
以前に未選択のパッケージ apache2-mpm-prefork を選択しています。
(データベースを読み込んでいます ... 現在 79203 個のファイルとディレクトリがインストールされています。)
(.../apache2-mpm-prefork_2.2.22-13+deb7u6_armhf.deb から) apache2-mpm-prefork を展開してい ます...
apache2-mpm-prefork (2.2.22-13+deb7u6) を設定しています ...
[....] Starting web server: apache2apache2: Could not reliably determine the server's fully qualified domain name, using 127.0.1.1 for ServerName
. ok
以前に未選択のパッケージ lsof を選択しています。
(データベースを読み込んでいます ... 現在 79208 個のファイルとディレクトリがインストールされています。)
(.../lsof_4.86+dfsg-1_armhf.deb から) lsof を展開しています...
以前に未選択のパッケージ php5-common を選択しています。
(.../php5-common_5.4.44-0+deb7u1_armhf.deb から) php5-common を展開しています...
以前に未選択のパッケージ libonig2 を選択しています。
(.../libonig2_5.9.1-1_armhf.deb から) libonig2 を展開しています...
以前に未選択のパッケージ libqdbm14 を選択しています。
(.../libqdbm14_1.8.78-2_armhf.deb から) libqdbm14 を展開しています...
以前に未選択のパッケージ libapache2-mod-php5 を選択しています。
(.../libapache2-mod-php5_5.4.44-0+deb7u1_armhf.deb から) libapache2-mod-php5 を展開しています...
以前に未選択のパッケージ php5 を選択しています。
(.../php5_5.4.44-0+deb7u1_all.deb から) php5 を展開しています...
以前に未選択のパッケージ php5-cli を選択しています。
(.../php5-cli_5.4.44-0+deb7u1_armhf.deb から) php5-cli を展開しています...
man-db のトリガを処理しています ...
lsof (4.86+dfsg-1) を設定しています ...
php5-common (5.4.44-0+deb7u1) を設定しています ...

Creating config file /etc/php5/mods-available/pdo.ini with new version
libonig2 (5.9.1-1) を設定しています ...
libqdbm14 (1.8.78-2) を設定しています ...
libapache2-mod-php5 (5.4.44-0+deb7u1) を設定しています ...

Creating config file /etc/php5/apache2/php.ini with new version
[....] Restarting web server: apache2apache2: Could not reliably determine the server's fully qualified domain name, using 127.0.1.1 for ServerName
 ... waiting apache2: Could not reliably determine the server's fully qualified domain name, using 127.0.1.1 for ServerName
. ok
php5 (5.4.44-0+deb7u1) を設定しています ...
php5-cli (5.4.44-0+deb7u1) を設定しています ...

Creating config file /etc/php5/cli/php.ini with new version
update-alternatives: /usr/bin/php (php) を提供するために 自動モード で /usr/bin/php5 を使います
root@satoraspi:~#
……と、いうわけで、サクッと入る。
それでは早速……。
root@satoraspi:/var/www# ログアウト
toshio@satoraspi:~$ cd /var/www
toshio@satoraspi:/var/www$ vi infotest.php
で、中身はこじんまりとこう書いて……
<html>
<head></head>
<body>
<?phpinfo();?>
</body>
</html>
早速ブラウザで見ると……
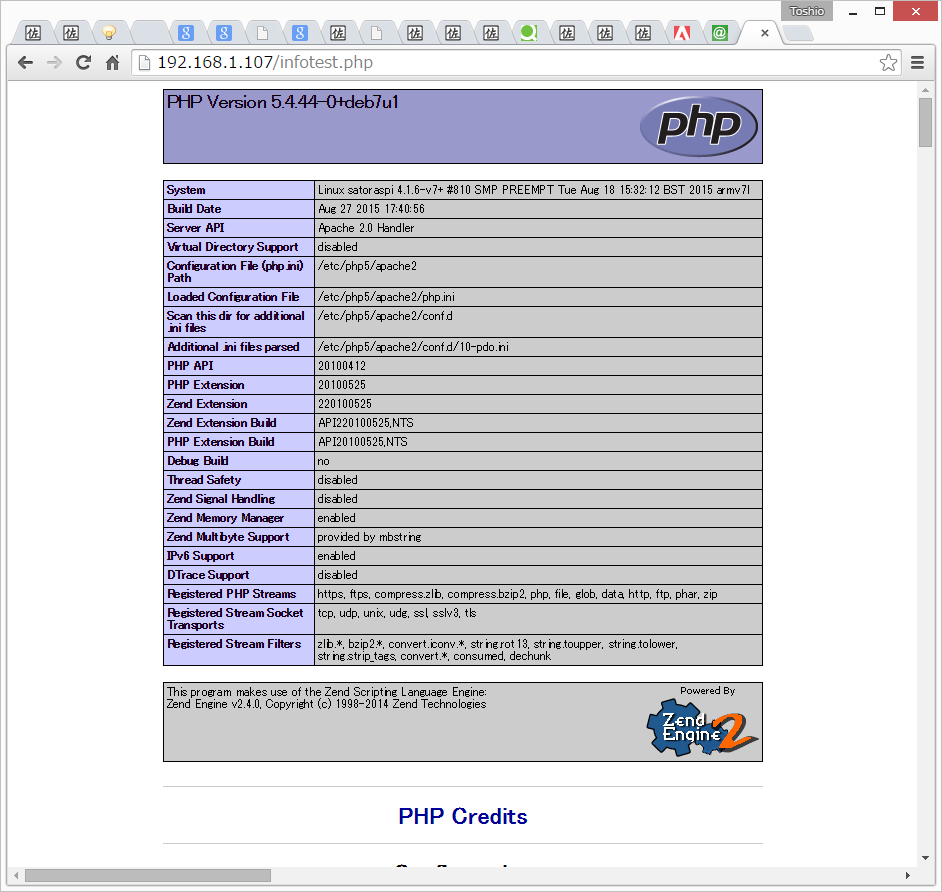
うん。動いちょる動いちょる。
さて、次に、phpからGPIOだな。マンネリだけどやっぱり「Lチカ」か。
「web2LED.php」
<html>
 <head>
  <meta name="Editor" content="vim">
  <meta http-equiv="Content-Type" content="text/html;charset=utf-8">
  <link rel="icon" href="favicon.ico" type="image/x-icon" />
  <link rel="Shortcut Icon" type="image/x-icon" href="favicon.ico" />
  <title>PHPでLチカ</title>
  <meta http-equiv="Keyword" content="佐藤俊夫, 佐藤, 俊夫, SATOTOSHIO, SatoToshio, sato, toshio, Raspberry Pi, Raspberry Pi 2 Model B">
 </head>
 <body bgcolor="#888888">
<body>
  <center>
  <h1>PHPでLチカ</h1>
  <hr>
  <form method="POST">
  <input type="submit" name="on"  value="LED on"><br>
  <input type="submit" name="off" value="LED off">
  </form>
  </center>
<?
ini_set( 'display_errors', 1 );
file_put_contents('/sys/class/gpio/export', 17);
file_put_contents('/sys/class/gpio/gpio17/direction', 'out');
if(isset($_POST['on'])){
  file_put_contents('/sys/class/gpio/gpio17/value', 1);
  print("LED ON.");
}elseif(isset($_POST['off'])){
  file_put_contents('/sys/class/gpio/gpio17/value', 0);
  print("LED OFF.");
}
file_put_contents('/sys/class/gpio/unexport', 17);
?>
</body>
</html>
ブレッドボードにLEDと330Ωの抵抗を直列につけて、17番ピンとアースにつなぐ。
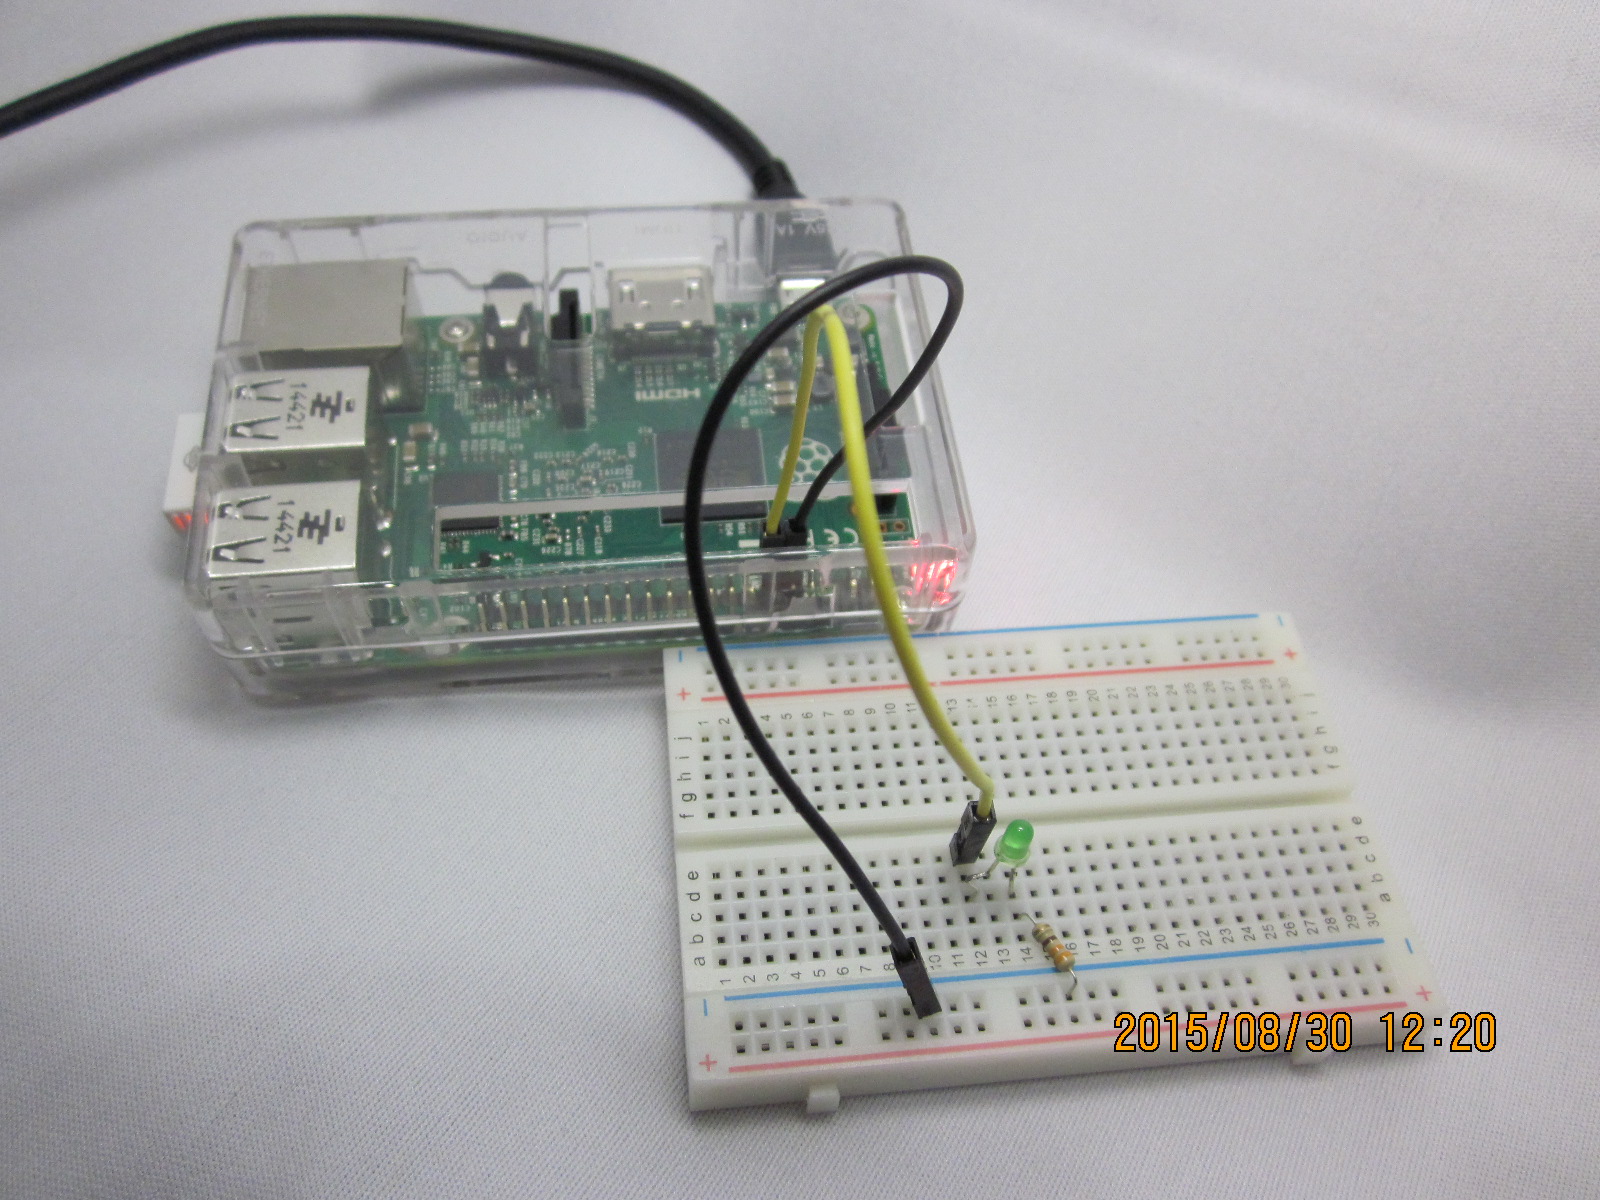
で、こういうフォームになるのだが……

いや、そりゃまあ、動くわけないわな、GPIOはrootでなきゃ読み書きできんのだから。
えーっと、どうやったらいいかな、ということで、
……などと、いろいろあるが、どうも、どれもいまいち、ピンと来ないな……。
まあ、GPIOのアクセスをヌルくする、これかなあ……。
toshio@satoraspi:~$ cd /sys/class
toshio@satoraspi:/sys/class$ su
パスワード:
root@satoraspi:/sys/class# chmod -R 777 gpio
root@satoraspi:/sys/class# ls -Flad gpio
drwxrwxrwx 2 root gpio 0  8月 30 13:20 gpio/
root@satoraspi:/sys/class#
なんっか、もう、力いっぱい777丸出しですけどね(笑)。多分、700とか760でも大丈夫じゃないかなあ。試してないけど。
で、まあ、これで、フォームをクリックするとLEDが点いたり消えたりする。
これをそのまま、いつぞやArduinoでやったSSR(ソリッド・ステート・リレー)につなぐと、家電製品のオン・オフなどができるわけだ。

では、やってみよう。
真ん中の黒い箱がSSRだ。Arduinoは5V、Raspberry Pi 2は3.3Vで電圧が違うが、このSSRは3Vから8Vまでの入力を受け付けるので、大丈夫なのである。
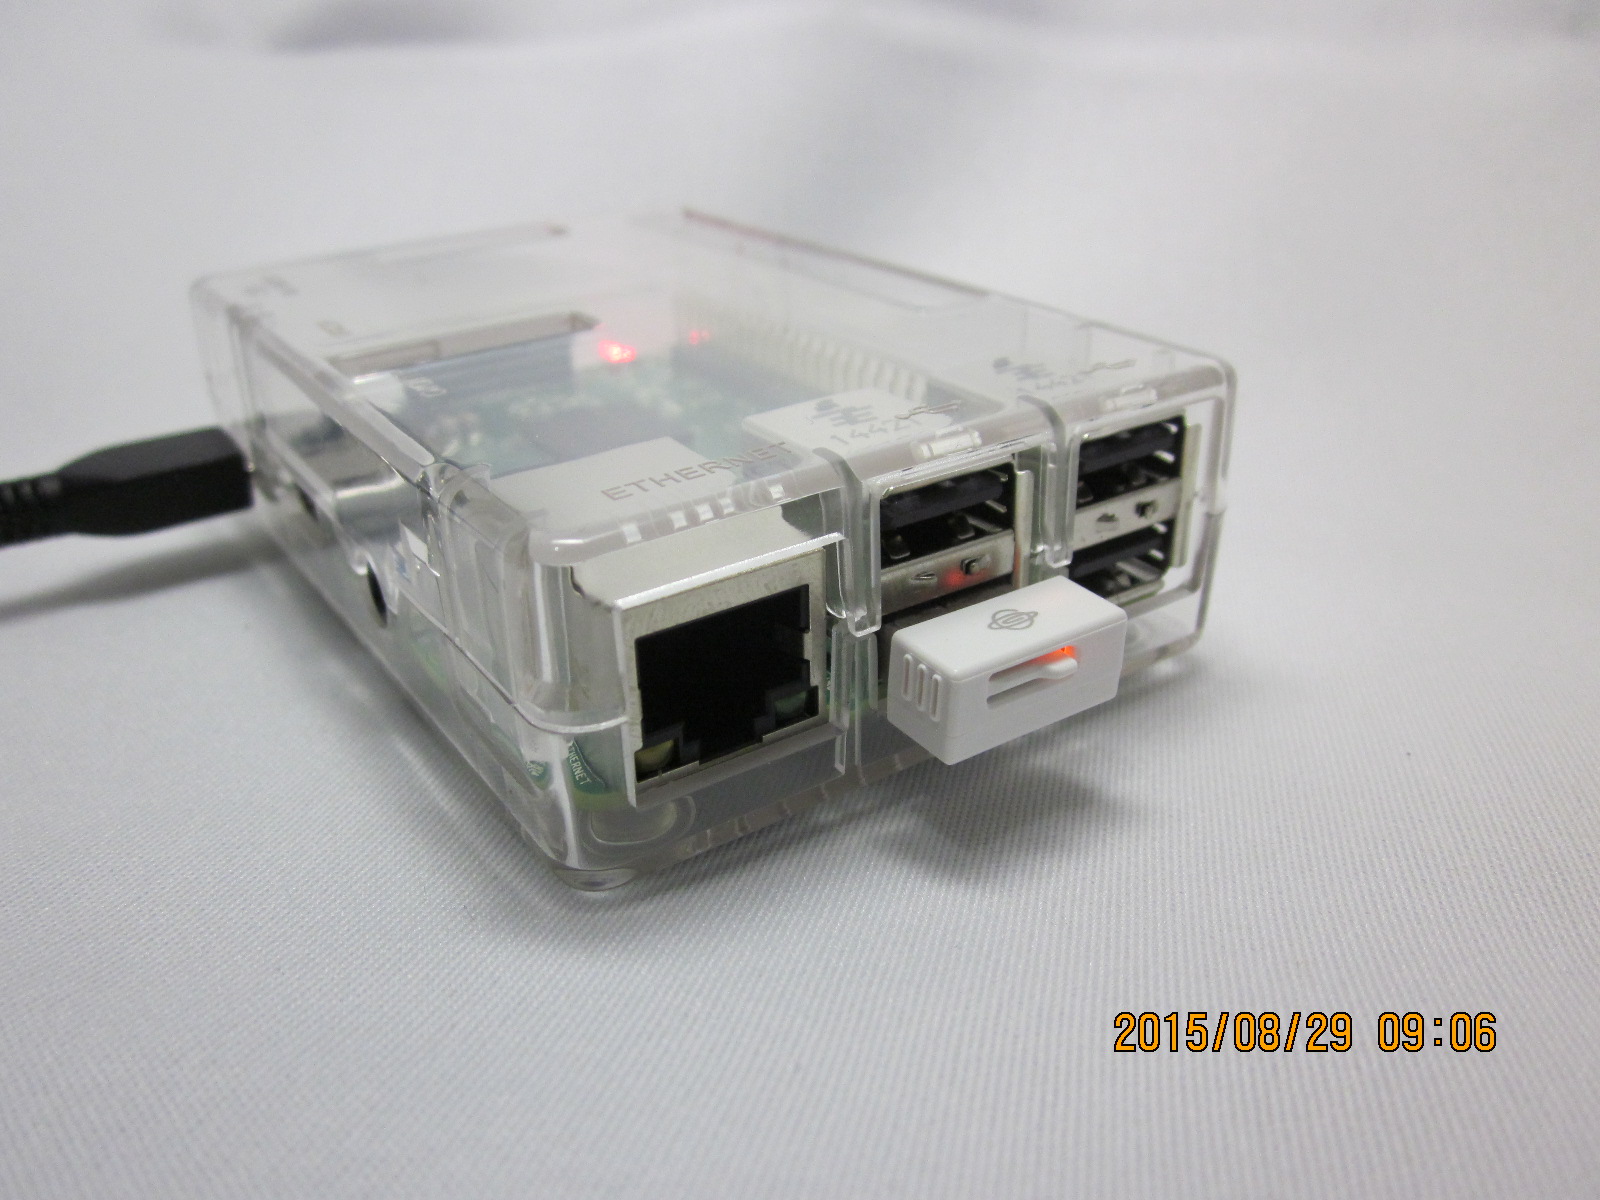
Raspberry Pi、線がダラダラつながっているのは面倒くさいから、メインのifをWiFiにしてみたい。たまたま、Raspberry Piと相性がいいと言われるUSBのWiFiアダプタ「PLANEX GW-USNano2」というのをかなり前から持っている。
USBポートにとりあえずこれを挿入し、
# lsusb
Bus 001 Device 002: ID 0424:9514 Standard Microsystems Corp.
Bus 001 Device 001: ID 1d6b:0002 Linux Foundation 2.0 root hub
Bus 001 Device 003: ID 0424:ec00 Standard Microsystems Corp.
Bus 001 Device 004: ID 2019:ab2a PLANEX GW-USNano2 802.11n Wireless Adapter [Realtek RTL8188CUS]
……もう、サクッとプラグアンドプレイの一発認識である。
# ifconfig
eth0      Link encap:イーサネット  ハードウェアアドレス b8:27:eb:45:1d:d0
          inetアドレス:192.168.1.105 ブロードキャスト:192.168.1.255  マスク:255.255.255.0
          UP BROADCAST RUNNING MULTICAST  MTU:1500  メトリック:1
          RXパケット:498 エラー:0 損失:1 オーバラン:0 フレーム:0
          TXパケット:253 エラー:0 損失:0 オーバラン:0 キャリア:0
      衝突(Collisions):0 TXキュー長:1000
          RXバイト:46665 (45.5 KiB)  TXバイト:34011 (33.2 KiB)

lo        Link encap:ローカルループバック
          inetアドレス:127.0.0.1 マスク:255.0.0.0
          UP LOOPBACK RUNNING  MTU:65536  メトリック:1
          RXパケット:8 エラー:0 損失:0 オーバラン:0 フレーム:0
          TXパケット:8 エラー:0 損失:0 オーバラン:0 キャリア:0
      衝突(Collisions):0 TXキュー長:0
          RXバイト:1104 (1.0 KiB)  TXバイト:1104 (1.0 KiB)

wlan0     Link encap:イーサネット  ハードウェアアドレス 00:22:cf:97:fe:b9
          inetアドレス:192.168.1.107 ブロードキャスト:192.168.1.255  マスク:255.255.255.0
          UP BROADCAST RUNNING MULTICAST  MTU:1500  メトリック:1
          RXパケット:506 エラー:0 損失:169 オーバラン:0 フレーム:0
          TXパケット:25 エラー:0 損失:0 オーバラン:0 キャリア:0
      衝突(Collisions):0 TXキュー長:1000
          RXバイト:128714 (125.6 KiB)  TXバイト:4541 (4.4 KiB)
これも、もう、イッパツ。
で、# shutdown -i0 -g0 -y、LANケーブル抜いて電源を入れなおす。
サクッとつながる。ケーブルがだらだらつながっていたのが減って、これはとてもいいなあ。
さて、今度はいろいろといじってみよう。
Raspberry PiとArduinoにはいろいろと違いがある。その違い認識は世間ではもうとうの昔に確定済みであるようだが、私はその無視できない一つが「アナログ入力のあるなしではないだろうか?」と思い至っている。
Arduinoはシンプルで扱いやすいにもかかわらず、10ビットのアナログ入力が6個もあり、これは意外と使い応えがある。抵抗やポテンショメータ、サーミスタ、CDSセル、音声など、実にいろいろなものをつなぐことができるのだ。
だが、Raspberry Piにはアナログ入力は、ない。
アナログ入力をしたければ、手段の一つに「Arduinoをつなぐ」というのがある。Arduinoを持っているなら、これは良い手段だが、なんだか無駄が大きい。
もう一つが、「A/D変換器をつなぐ」ということだ。A/D変換IC、つまり「ADC」は、百何十円~数百円だから安い。合理的である。
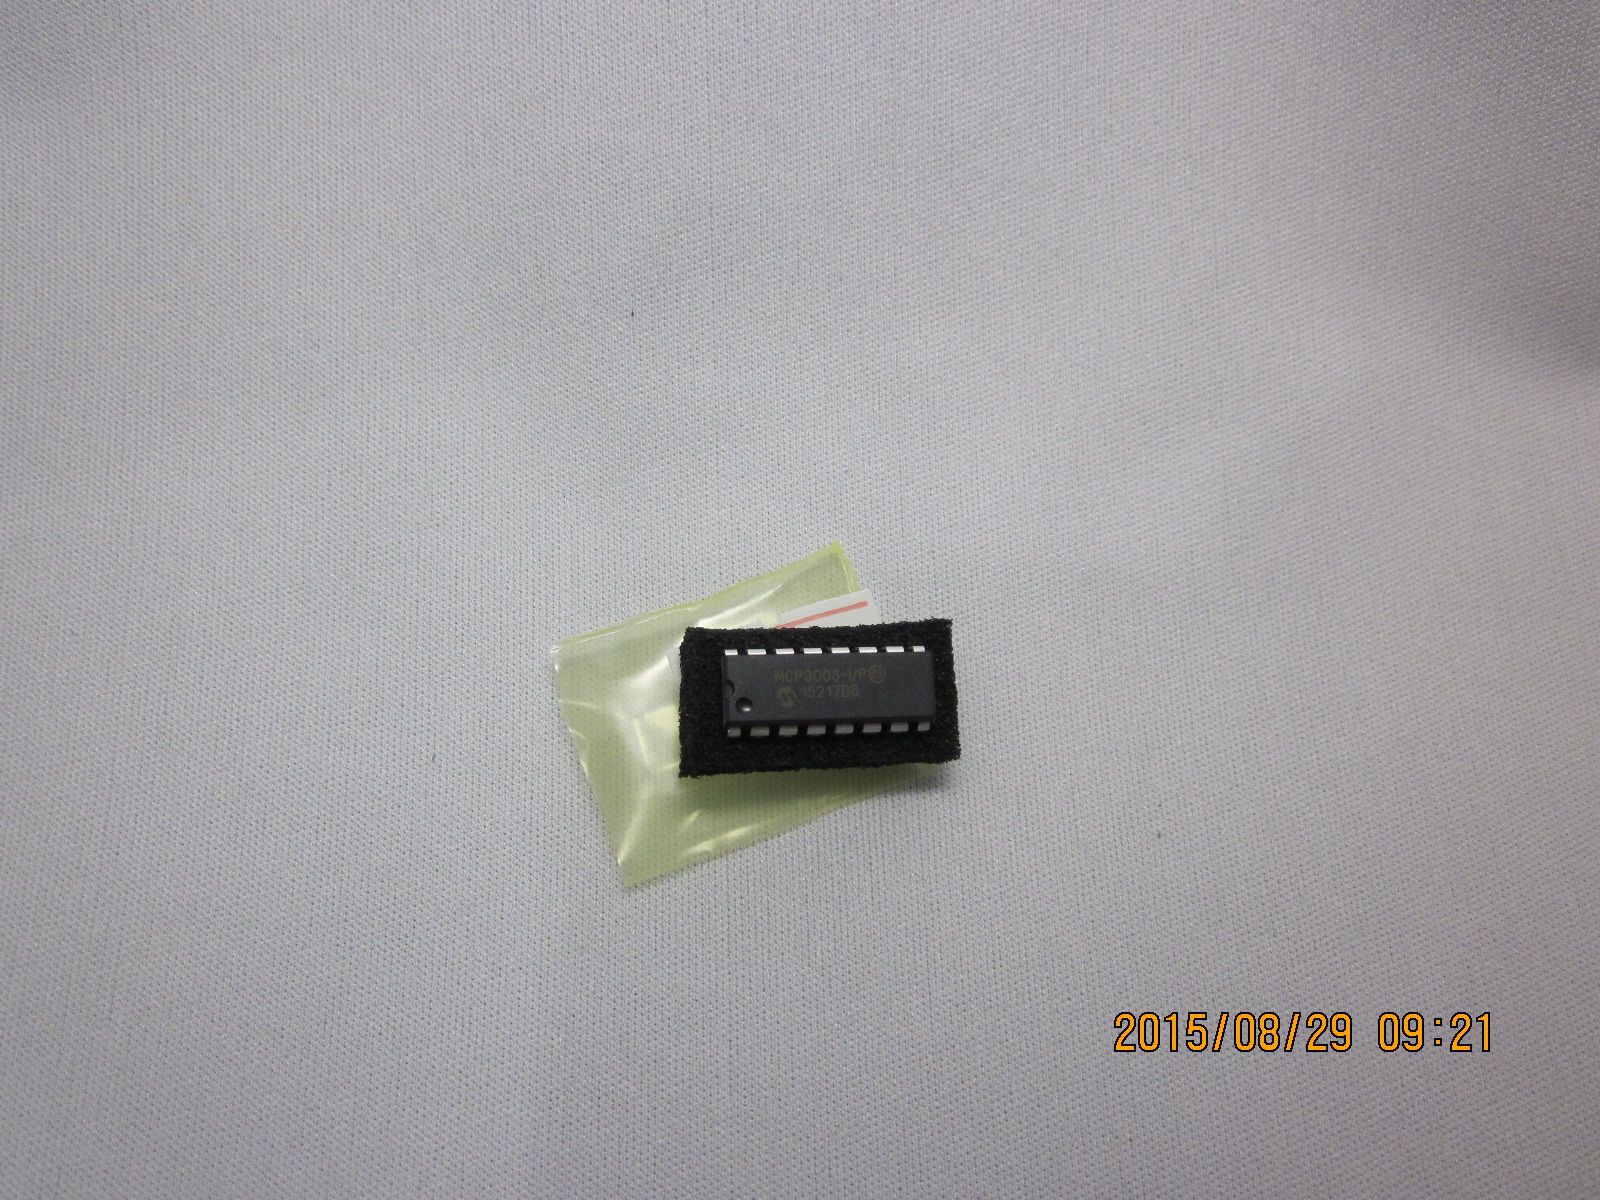
これについて解説しておられるサイトはたくさんある。それを参考にさせていただき、早速秋葉原へ行って2種類ばかりICを買い込む。
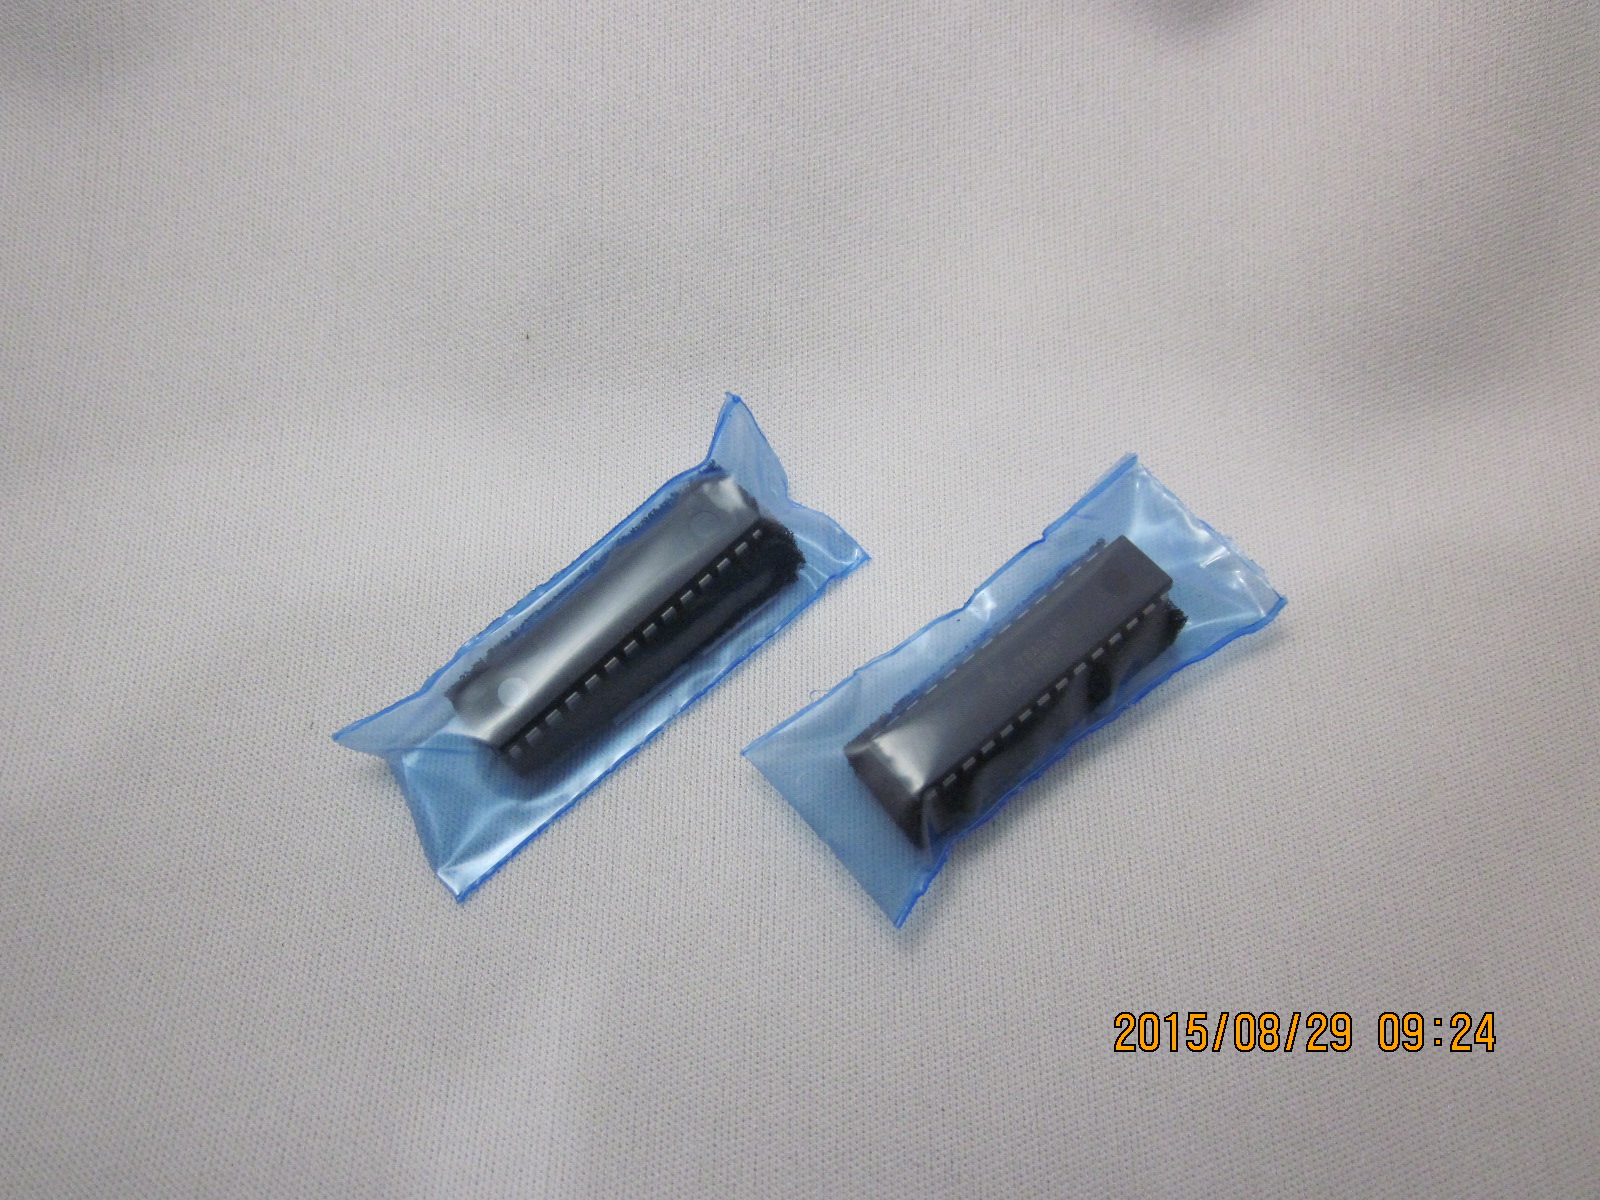
これは、マイクロチップ・テクノロジー社製の「MCP3008-I/P」。8チャンネル10ビット、千石電商で320円。
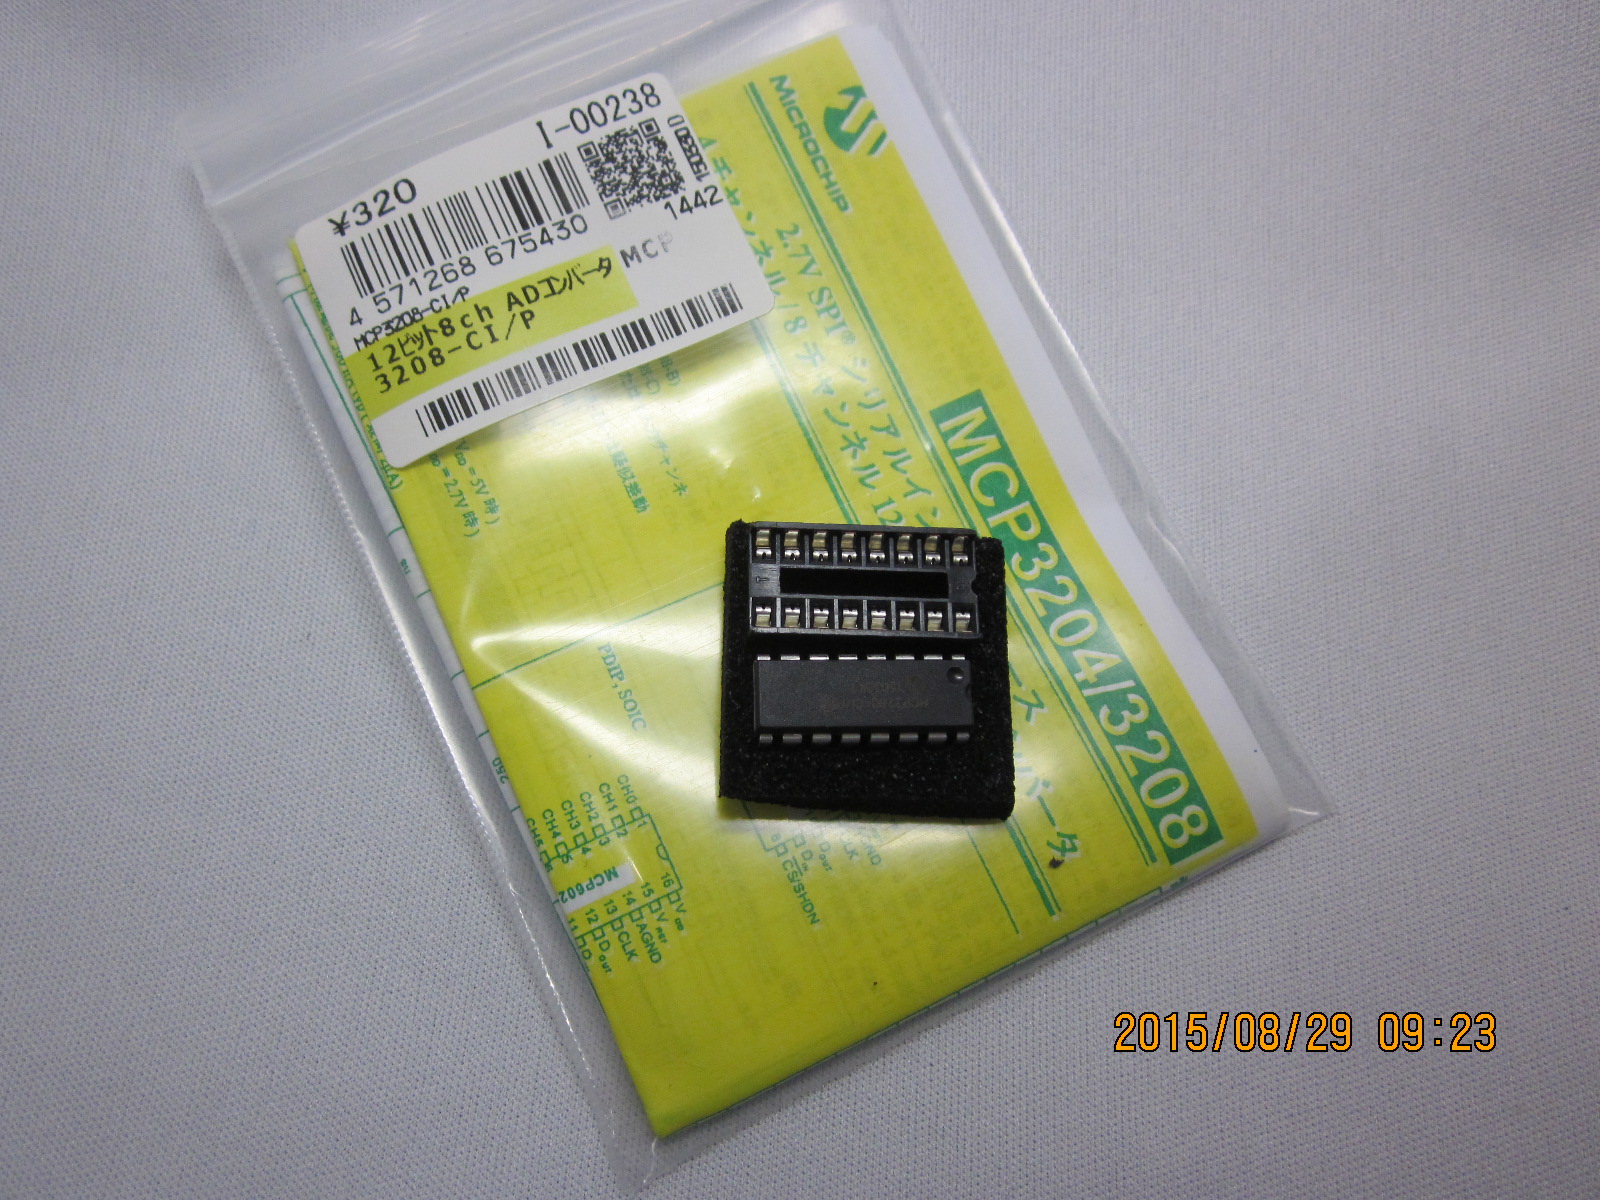
コッチは、同じくマイクロチップ・テクノロジー社の「MCP3208-CI/P」。こちらも8チャンネルだが、幅は12ビット。秋月電子でソケット付き、データシート付きで320円。
ついでにこの前壊したTLC5940NTも二つ買い込む。これも390円。
で、まずはMCP3208から試してみよう。
Raspberry PiとICは、SPI通信でつなぐ。そのため、まず、Raspberry PiでSPI通信を行う要領を知る必要がある。
Raspberry Piの場合は、SPIのモジュールをインストールしたり、ブラックリストから外すなどの着意が必要であったようだが、Raspberry Pi 2 の場合は、どうやらそのような操作は必要がなく、「# raspi-config」でAdvancedの中からSPIを選び、enableにすればよい。
lsmodで確認し、次のように「spi_bcm2835」というモジュールが入っていればSPIが使える。
$ lsmod
Module                  Size  Used by
cfg80211              420690  0
rfkill                 16659  1 cfg80211
snd_bcm2835            19769  0
snd_pcm                74825  1 snd_bcm2835
snd_seq                53561  0
snd_seq_device          3650  1 snd_seq
snd_timer              18157  2 snd_pcm,snd_seq
snd                    52116  5 snd_bcm2835,snd_timer,snd_pcm,snd_seq,snd_seq_device
8192cu                528485  0
spi_bcm2835             7100  0
i2c_bcm2708             5014  0
uio_pdrv_genirq         2966  0
uio                     8235  1 uio_pdrv_genirq
さっそくブレッドボードにMCP3208を配置し宮城大学のサイトの記事にあるコードを使わせてもらったのだが、これがそのままでは動かず、ハマッた、ハマッた……。

何か、Raspberry PiとRaspberry Pi 2 で、ioctrlに渡すデータ長に違いでもあるらしく、かなり試行錯誤した末、このようになった。
宮城大学のサイトにあった元のコード(“raspSPI.cpp”内)
//  sendRecN: Nバイトデータの送信と受信(2048バイトまで)
void SPI::sendRecN (unsigned char *send, unsigned char *rec, int n)
{
    //  setup a block
    struct spi_ioc_transfer tr[1];
    tr[0].tx_buf = (unsigned int) send;
    tr[0].rx_buf = (unsigned int) rec;
    tr[0].len    = n;
    tr[0].speed_hz      = clock;
    tr[0].delay_usecs   = SPI_DELAY;
    tr[0].bits_per_word = SPI_BITS;
    tr[0].cs_change     = 0;
    //  send this byte
    int ret = ioctl(fd, SPI_IOC_MESSAGE(1), tr);
    if (ret < 0) {
        printf("error: cannot send spi message (SPI::sendRecN)\n");
        exit(-1);
    }
}
Raspberry Pi model Bで動くように少し変更したコード(tr[]の個数と、tr[0]に渡す値のキャストを「int」から「unsigned long」に変更している)
//  sendRecN: Nバイトデータの送信と受信(2048バイトまで)
void SPI::sendRecN (unsigned char *send, unsigned char *rec, int n)
{
    //  setup a block
    struct spi_ioc_transfer tr[3];
    tr[0].tx_buf = (unsigned long) send;
    tr[0].rx_buf = (unsigned long) rec;
    tr[0].len    = n;
    tr[0].speed_hz      = clock;
    tr[0].delay_usecs   = SPI_DELAY;
    tr[0].bits_per_word = SPI_BITS;
    tr[0].cs_change     = 0;
    //  send this byte
    int ret = ioctl(fd, SPI_IOC_MESSAGE(1), tr);
    if (ret < 0) {
        printf("error: cannot send spi message (SPI::sendRecN)\n");
        exit(-1);
    }
}
(作動させた画面の様子)
  1132   867   827   829   833   838   877  2670
  1090   829   787   787   792   797   845  2668
  1028   768   725   721   724   732   796  2671
   929   678   631   623   625   636   737  2669
   791   534   471   444   429   435   572  2667
   408   172    94    54    29    53   281  2668
    84     0     0     0     0     0   111  2666
     0     0     0     0     0     0    20  2671
     0     0     0     0     0     0     0  2670
     0     0     0     0     0     0     0  2668
    19    29    34    39    41    36    27  2670
    87    93   101   110   114   107    81  2670
   173   173   183   195   201   186   146  2671
   274   276   300   327   347   339   276  2667
   614   609   650   692   727   698   552  2668
   948   901   907   902   911   916   741  2672
  1102   916   878   886   894   899   854  2670
  1160   888   865   868   873   878   913  2671
  1137   872   832   833   838   843   903  2665
  1093   830   788   787   792   796   869  2668
  1027   767   723   717   721   727   815  2669
   938   685   638   631   632   643   748  2669
   821   566   504   482   467   474   603  2665
   447   206   128    89    62    85   303  2669
   107     0     0     0     0     0   123  2670
     0     0     0     0     0     0    32  2669
     0     0     0     0     0     0     0  2667
     0     0     0     0     0     0     0  2670
    14    23    29    34    37    32    29  2669
    81    86    94   102   104    98    80  2665
   170   167   177   186   191   174   141  2671
   267   267   290   314   333   323   263  2668
   598   593   631   669   702   672   536  2670
   936   888   908   904   913   914   723  2669
  1098   917   876   888   894   899   840  2668
  1157   895   864   869   875   878   904  2668
  1138   873   834   835   841   844   902  2667
7番ピンにポテンショメータをつなぎ、残りのピンは解放してあるので、乱雑な値が出ている。
Raspberry PiのGPIOに何かをつなごうとして、何の用意もしていないと戸惑うのが、
「Raspberry PiのGPIO端子は、オスだ」
……ということかも知れない。
Raspberry Piの端子は、2.54mmピッチのピンヘッダだ。このピンヘッダには、2550、あるいはQIとも言われるコネクタを使うと接続することができる。
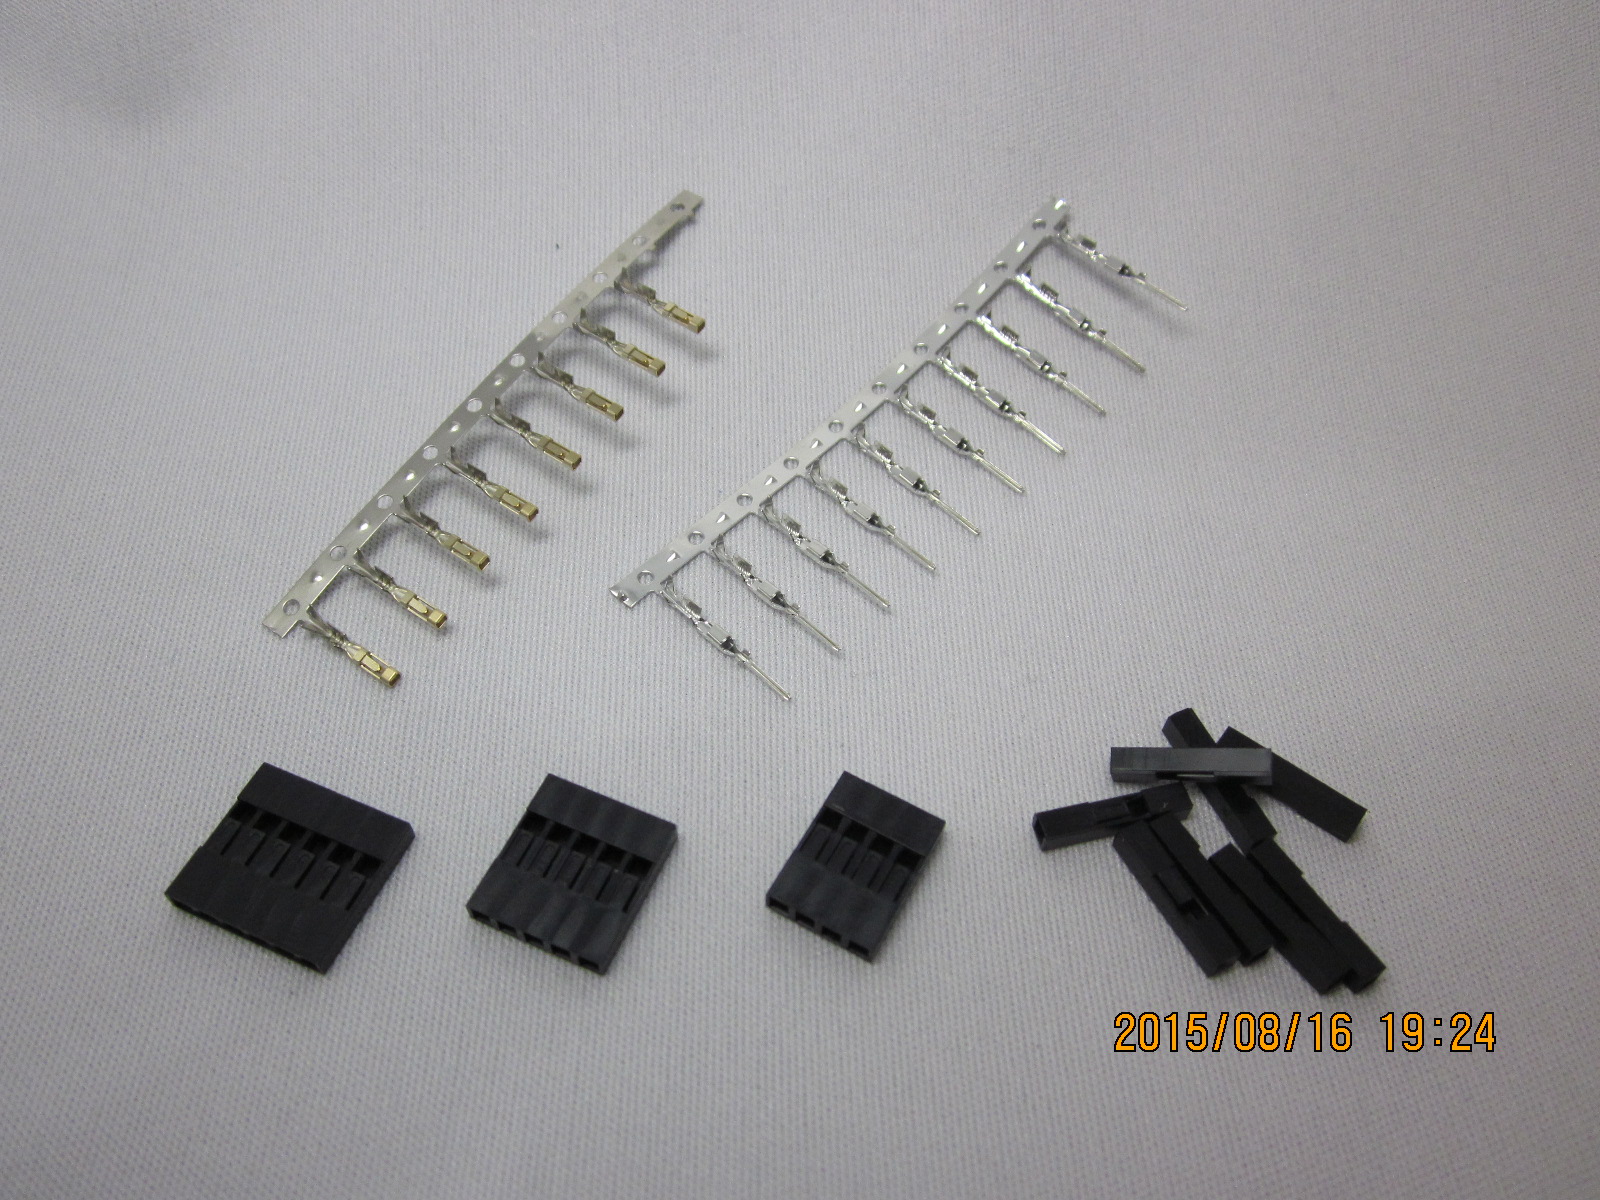
上の写真はそのQIコネクタ類だが、それで言えば、一番左のメスの端子を切り外し、適切な電線に圧着してハウジングを取り付ければ、それをRaspberry Piに接続できるようになる。
ところが、どうもこの「QIコネクタ」、情報が少ない。作り方にも多少のコツがある。それで、私が書こうか、と思ったら、既に詳しく紹介されているサイトがあった。
もう、このサイトが書いておられること以上には付け加えることなどないが、工具については、5年前に私のブログでも紹介しているので、参考にする方がいるならお役立ていただきたい。エントリは5年前のものだが、昨日(平成27年8月15日(土))千石電商本店の1階に立ち寄ったところ、まったく同じ工具がほぼ同じ値段で売られていたことを付け加えておきたい。
私のエントリで紹介している工具は、大西工業株式会社の「No.150 MINI クリンピングプライヤー」である。この工具を使う場合は、一番手前の「AWG22・0.3mm^2」のダイスで導線をかしめ、被覆は一つ隣の「20・0.5」のダイスで半分だけかしめて、残りを普通のラジオペンチで締めあげるとよい。

私のエントリでも触れている通り、QIコネクタは、Raspberry Piや電子工作だけではなく、PCの内部など、いろいろなところで使われている規格なので、覚えておけば何か修理や改造の必要に迫られたときに役立つと思う。
QIコネクタやそのハウジングは、秋葉原千石電商本店なら、入り口から見て左側の、一番奥より少し手前の小さい抽斗の中段くらいに入っている。
5年前当時は、使い方が良く分からなかったので、レジの店員さんに「このコネクタ、カシめ方と、使う工具を教えてもらえませんでしょうか」と頼んだら、得たりとばかりの落ち着いた態度で、実際の使い方とコツ、注意点を、店のディスプレイ用にとっておいてある端子だと思うが、それで実演してくれたものであった。若い店員さんだったが、その該博な知識と技に驚嘆したものであった。
先日、八潮の秋月電子の初老の店員さんは、「これにハウジングみたいなモンは存在しませんよ」と言っていたが、千石電商にはあるので、秋月に行って見つからなければ、千石電商で買うとよいと思う。
私も、秋月電子八潮店で、「いや、ありますよ」と店員さんに直接教えて上げられればよいのだが、私は素人なので、プロに対してそこまでする義理はないだろう。
で、LED1個では寂しいから、同じコードを繰り返して、8個でLチカ。
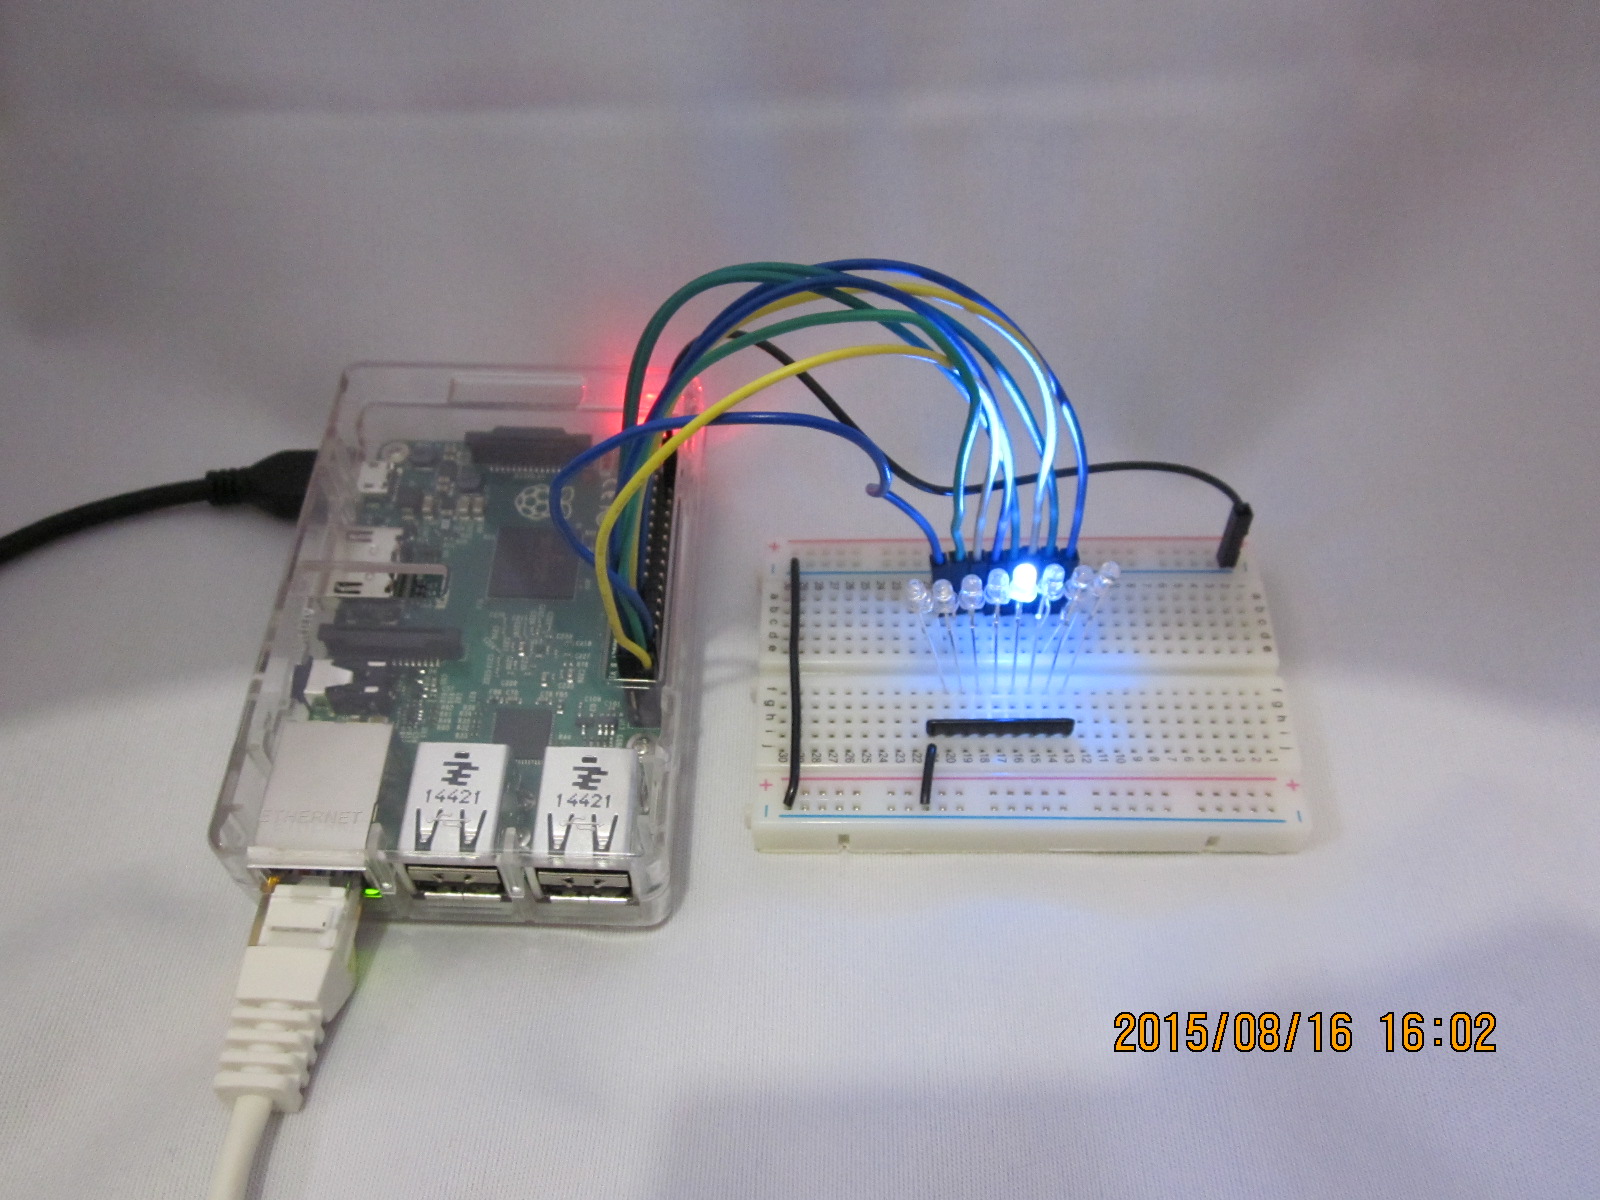
抵抗は8素子9ピンの集合抵抗、各素子330Ω。Vfが3.0~3.4V、Ifが20mAとある青色LEDなのだが、抵抗がこれだけならせいぜい10mAくらいだ。GPIOの各ピンから流せる電流は50mAまでだそうなので、まあ、大丈夫だろう。
動かすとこんな感じ。
プログラムは、GPIOのセットアップをするシェルと、Perlのスクリプトだ。
シェルはこのようなもの。コピペで繰り返しただけ。シェル内の数字がピン番号。
#!/bin/sh
echo  5 >/sys/class/gpio/export
echo  6 >/sys/class/gpio/export
echo 13 >/sys/class/gpio/export
echo 19 >/sys/class/gpio/export
echo 26 >/sys/class/gpio/export
echo 21 >/sys/class/gpio/export
echo 20 >/sys/class/gpio/export
echo 16 >/sys/class/gpio/export
echo out >/sys/class/gpio/gpio5/direction
echo out >/sys/class/gpio/gpio6/direction
echo out >/sys/class/gpio/gpio13/direction
echo out >/sys/class/gpio/gpio19/direction
echo out >/sys/class/gpio/gpio26/direction
echo out >/sys/class/gpio/gpio21/direction
echo out >/sys/class/gpio/gpio20/direction
echo out >/sys/class/gpio/gpio16/direction
Perlも同じで、コピペで繰り返しただけ。……「配列に書けよ」とかの至極もっともなツッコミはナシの方向でお願いいたしますです(笑)。
#!/usr/bin/perl
#  perl2LEDx8
#    perlで8個Lチカ
#    27.8.16(日)1500~
#    佐藤俊夫
#
use strict;
use warnings;
use Time::HiRes 'sleep';
open(LED1, ">/sys/class/gpio/gpio5/value");
open(LED2, ">/sys/class/gpio/gpio6/value");
open(LED3, ">/sys/class/gpio/gpio13/value");
open(LED4, ">/sys/class/gpio/gpio19/value");
open(LED5, ">/sys/class/gpio/gpio26/value");
open(LED6, ">/sys/class/gpio/gpio21/value");
open(LED7, ">/sys/class/gpio/gpio20/value");
open(LED8, ">/sys/class/gpio/gpio16/value");
LED1->autoflush(1);
LED2->autoflush(1);
LED3->autoflush(1);
LED4->autoflush(1);
LED5->autoflush(1);
LED6->autoflush(1);
LED7->autoflush(1);
LED8->autoflush(1);
while(){
  print LED8 0;
  print LED1 1;
  sleep(0.2);
  print LED1 0;
  print LED2 1;
  sleep(0.2);
  print LED2 0;
  print LED3 1;
  sleep(0.2);
  print LED3 0;
  print LED4 1;
  sleep(0.2);
  print LED4 0;
  print LED5 1;
  sleep(0.2);
  print LED5 0;
  print LED6 1;
  sleep(0.2);
  print LED6 0;
  print LED7 1;
  sleep(0.2);
  print LED7 0;
  print LED8 1;
  sleep(0.2);
}