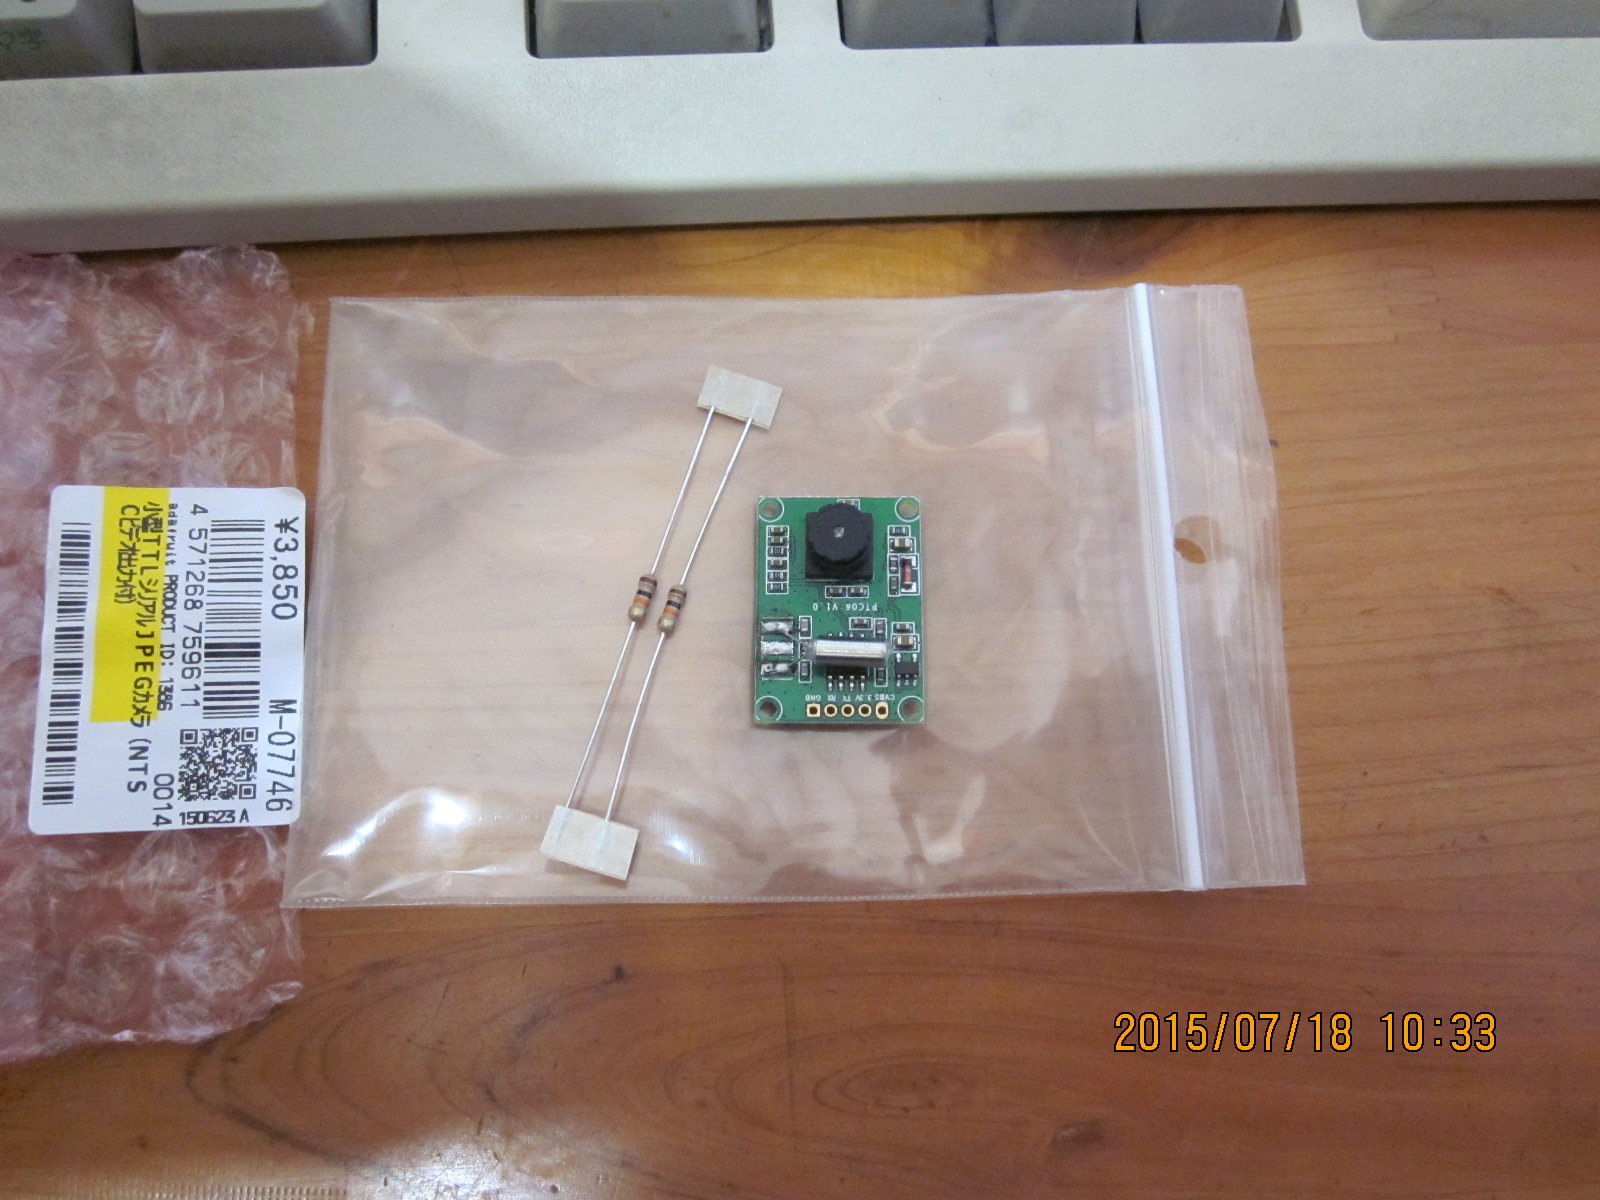
秋月電子のサイトを見ていると、小さなカメラがあり、Arduinoに付きそうな感じだ。
3850円。Arduino自体が2800円かそこらなので、それに比べるとちょっと高いが、早速行って購入。
だが、あまり情報は多くない。まず、メーカーのサイトを見ていくと、チュートリアルがあり、「とりあえずテストするには、電源をくれてやって、一番端のピンをテレビにつなぎゃあ絵が出る」みたいなザックリ感満載の解説が。それで、テレビにつなぐためのRCAジャックなども買う。
チュートリアルはこれを読んでおけばだいたいいいようだ。
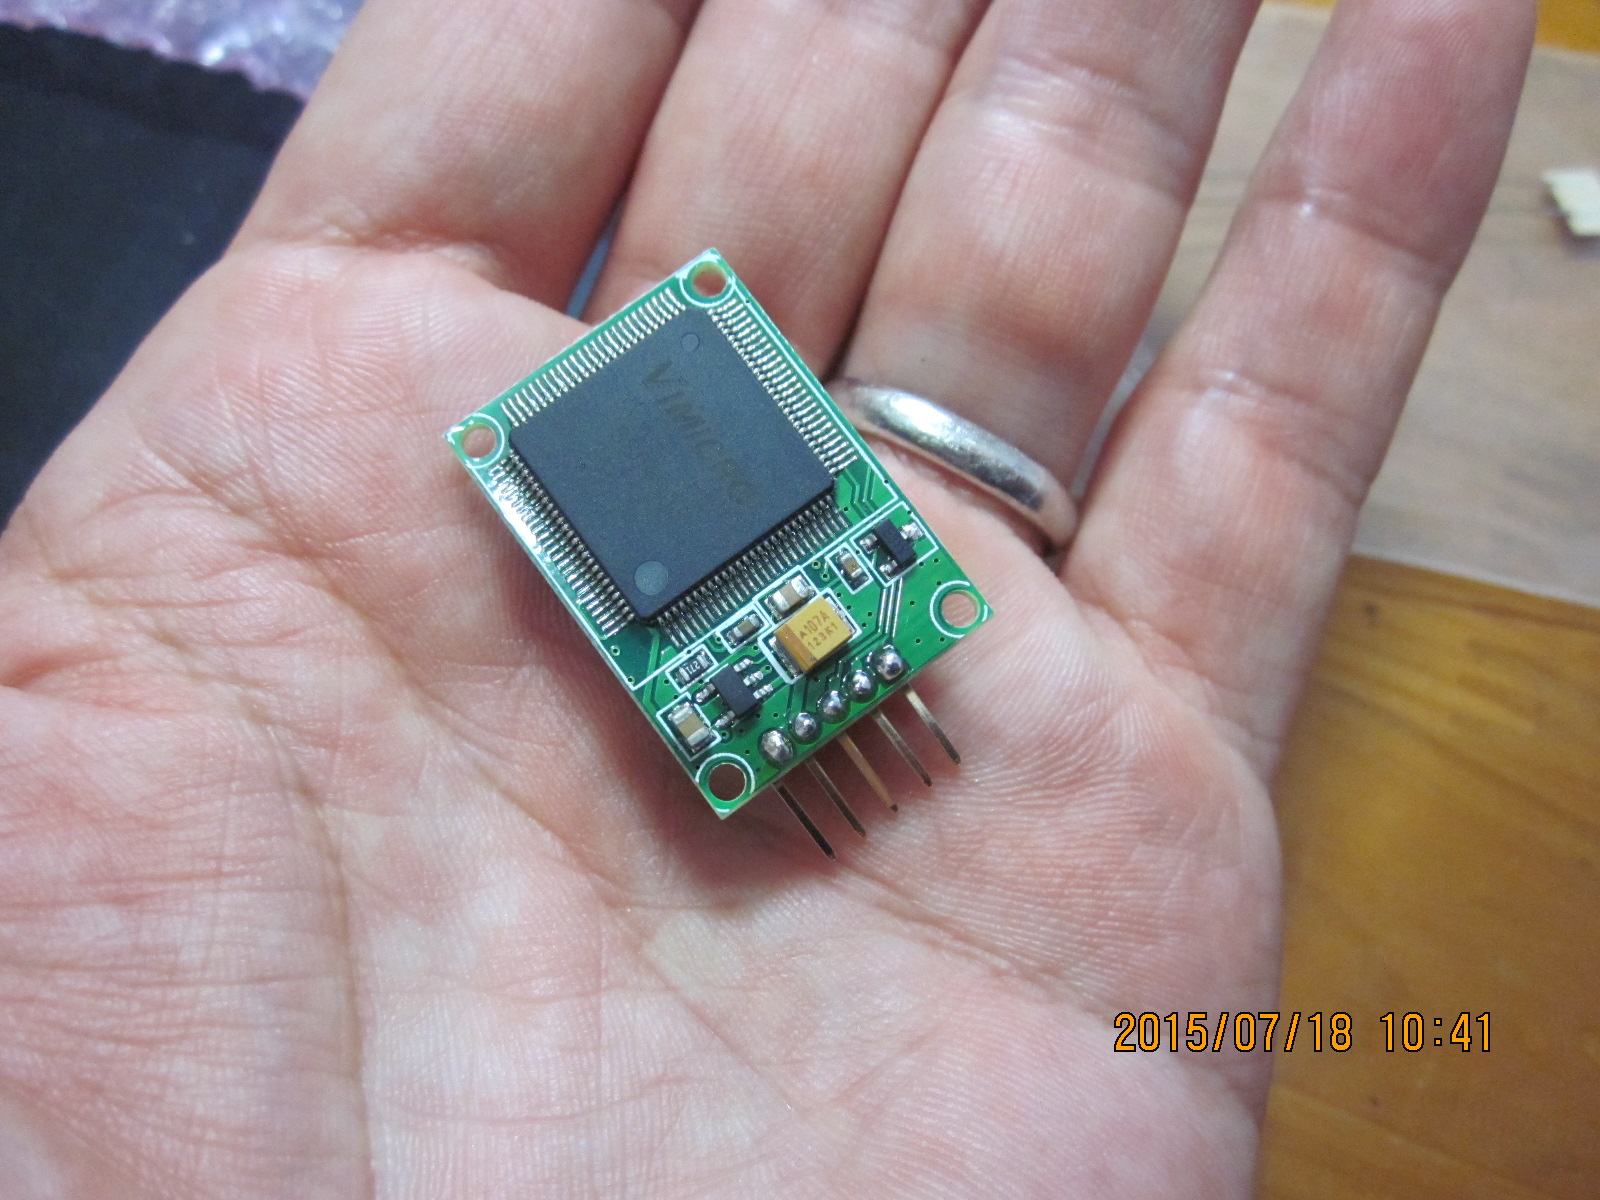
ほどいてみるとこんな感じで、かなり小さい。
ピンのピッチが2mmで、ブレッドボードで扱いにくい。それで、普通の2.54mmのピンヘッダを出して、その根元をこんなふうにムリヤリ(笑)2mmピッチにせばめる。
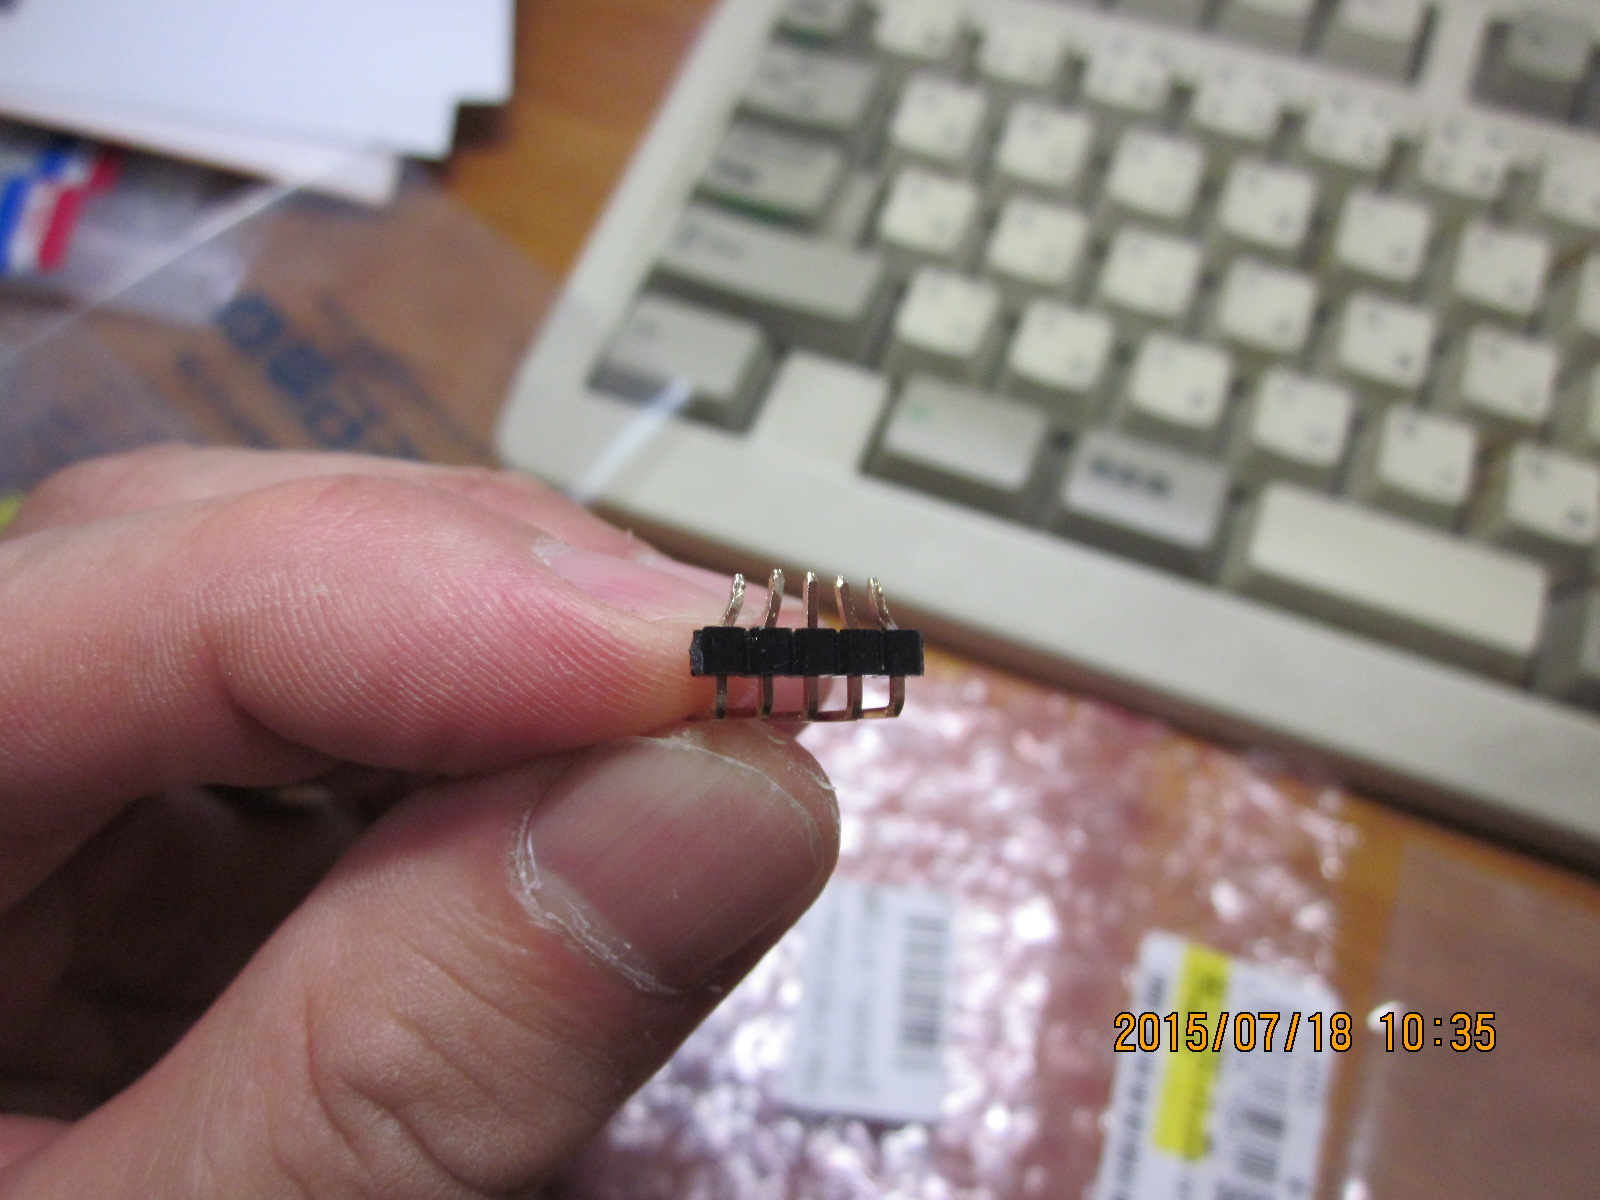
こいつをカメラの基盤にえいやっ、とねじ込み、半田付けする。
なかなか小さいので、ルーペと老眼鏡を併用しつつ、ICなんか壊しちゃってもナンだから、20Wのぬるくて細い半田鏝でさっさとつける。

我ながらなかなかスピーディな仕事だなあ(笑)。
で、メーカーのサイトには「5V」と書いてあるが、これは互換品の別の製品のためのチュートリアルのようで、買ってきたものの基盤をよく見ると「3.3V」と印刷されている。壊してはもったいないから、3.3Vで試す。3.3Vの電源代わりにArduinoの3.3Vピンを使う。
基盤の印刷通り、3.3V、GND、それから右端のピンをRCAジャックのセンターに、RCAジャックのアースを同じくGNDに入れて、テレビの前に持っていく。
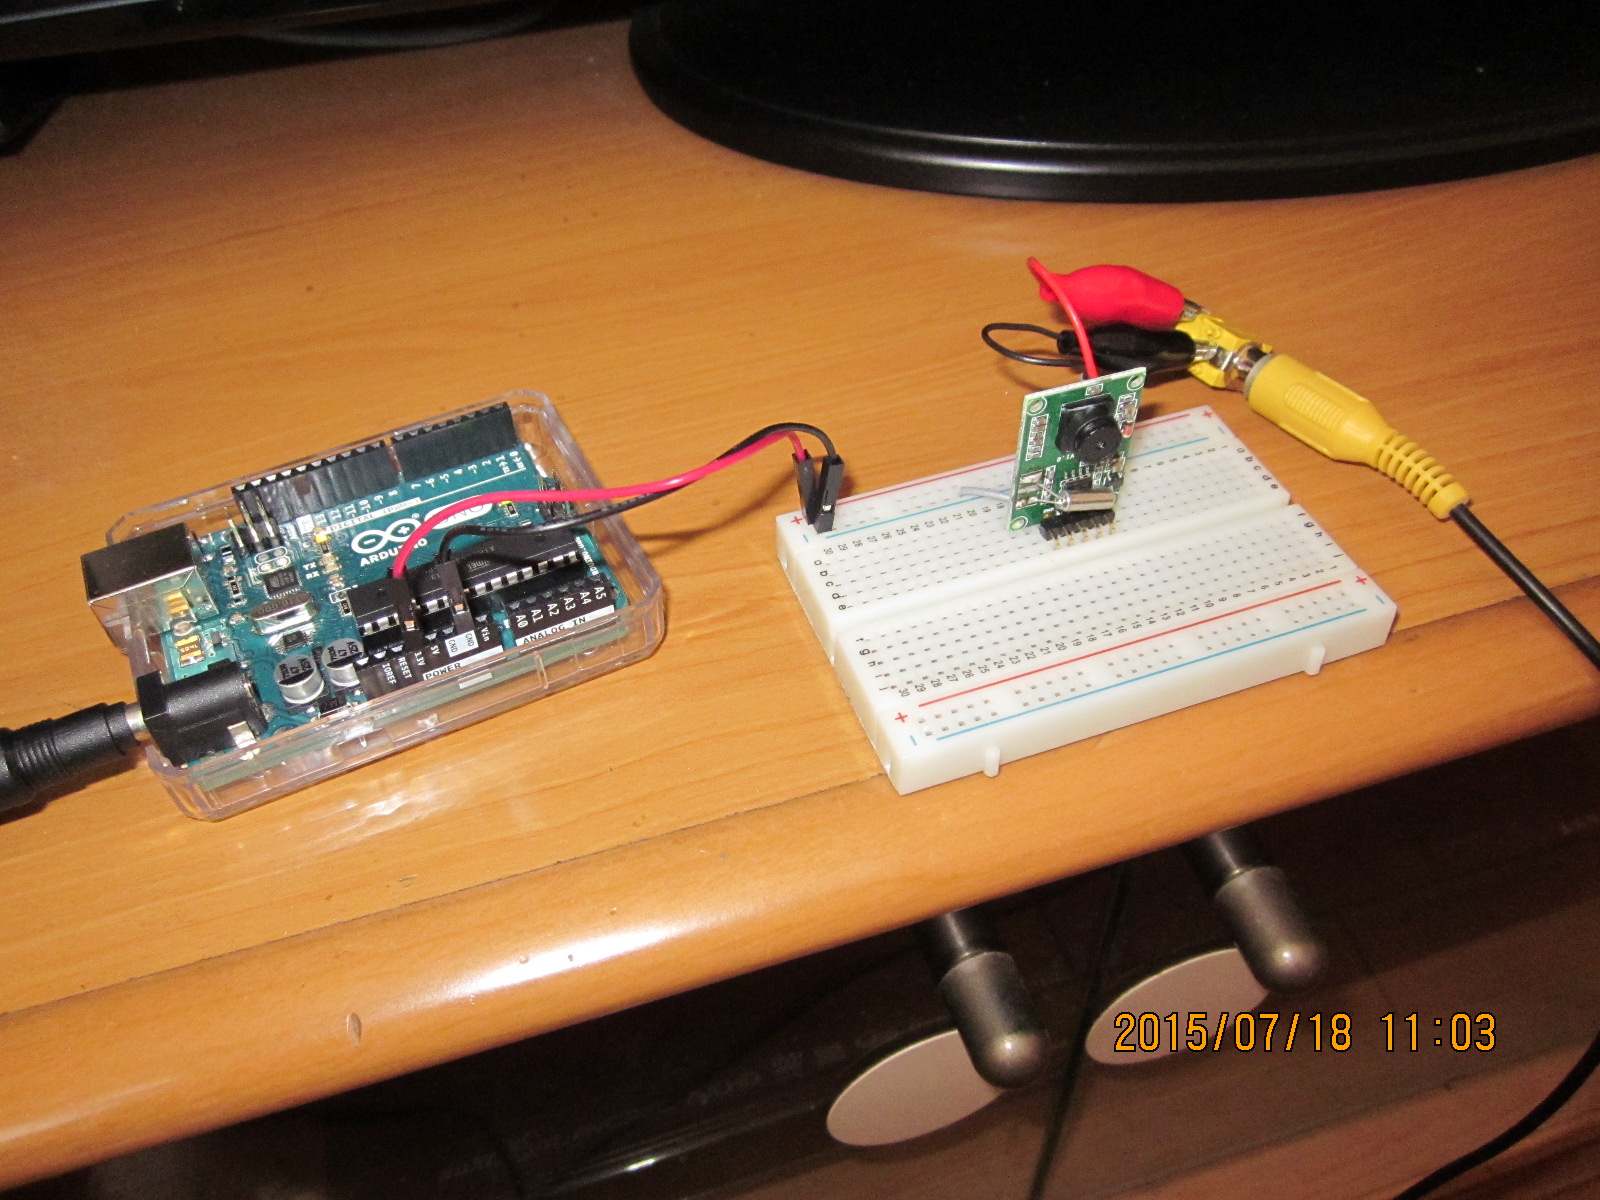
テレビにつなぐと、おお、確かに、値段なりのフザけた画質(笑)で、自分の顔が映る。
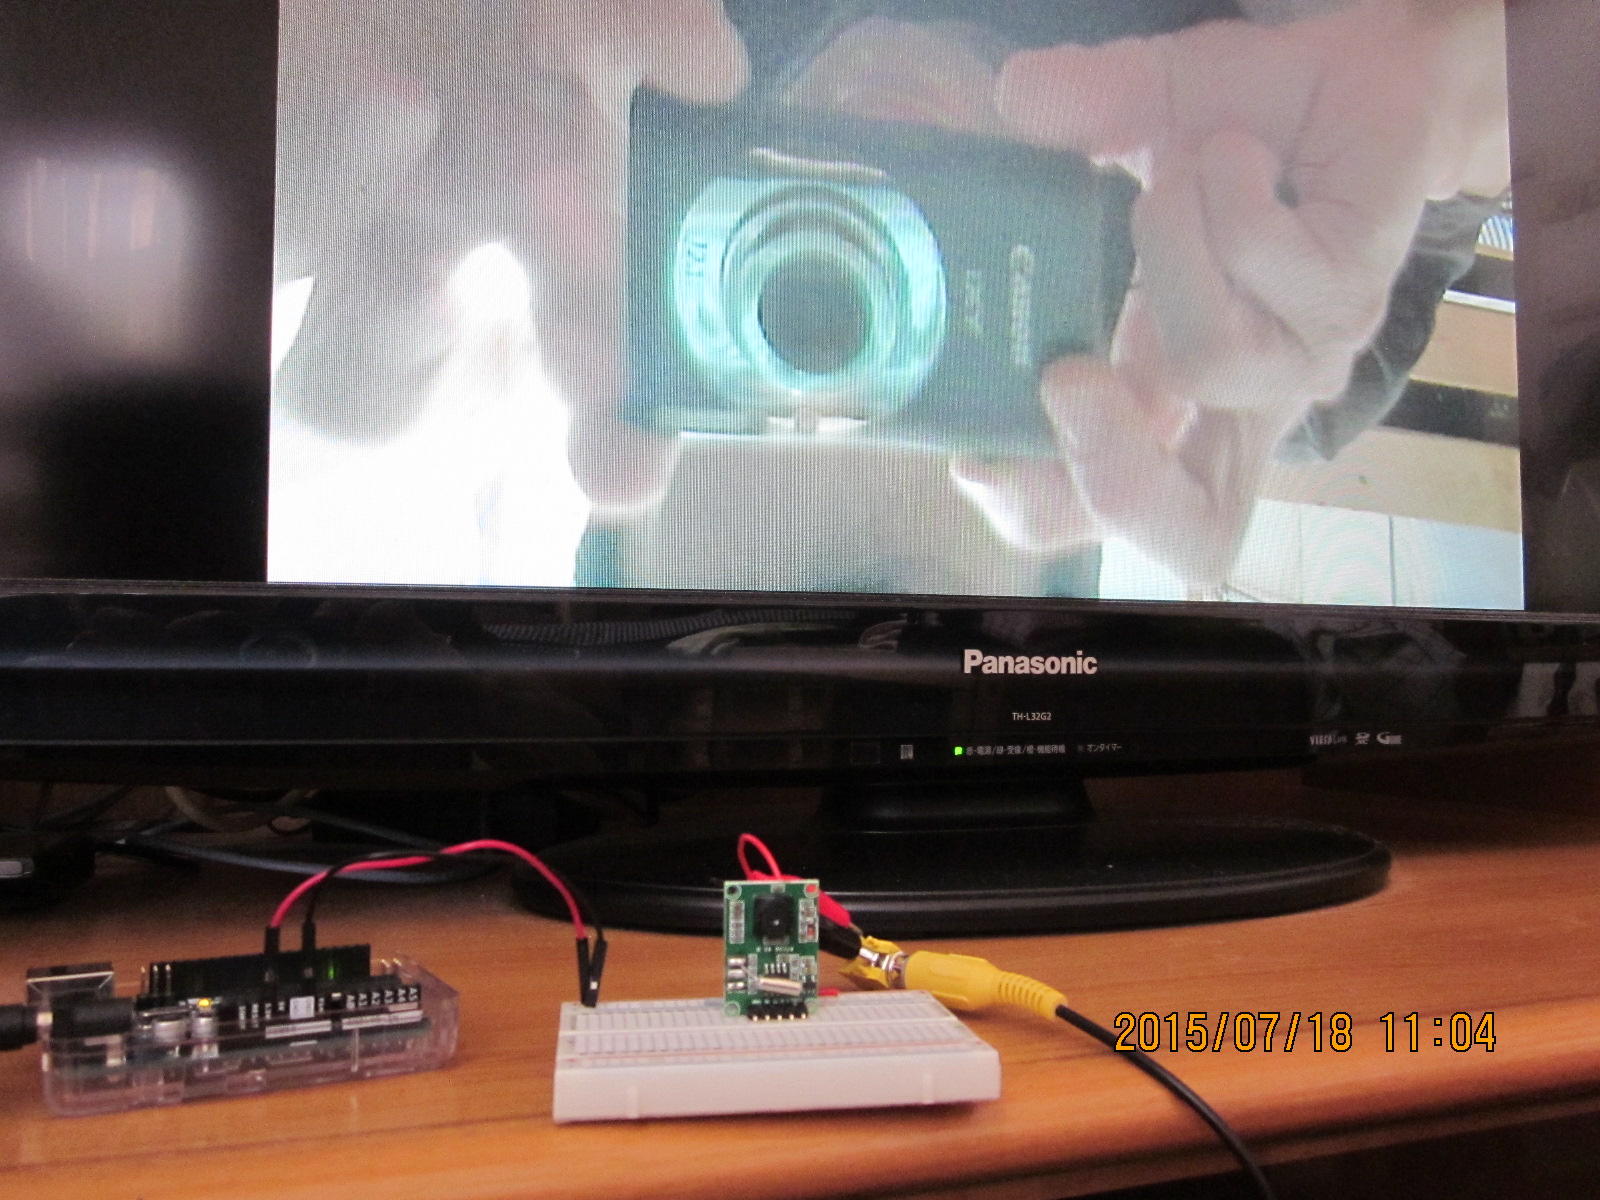
上下が逆だが、まあ、いいや。
で、今度はArduinoで画像を撮影してみよう。
チュートリアルにしたがってArduino用のライブラリをダウンロードし、これをArduinoのインストールフォルダの「libraries」に配置する。
そうしておいてArduinoのIDEを起動すると、「ファイル」→「スケッチの例」の中に「Adafruit VC0706 Serial Camera Library」が現れるから、この中から「Snapshot」を選ぶ。これは静止画をjpegで撮影するスケッチのサンプルだ。
// This is a basic snapshot sketch using the VC0706 library.
// On start, the Arduino will find the camera and SD card and
// then snap a photo, saving it to the SD card.
// Public domain.

// If using an Arduino Mega (1280, 2560 or ADK) in conjunction
// with an SD card shield designed for conventional Arduinos
// (Uno, etc.), it's necessary to edit the library file:
//   libraries/SD/utility/Sd2Card.h
// Look for this line:
//   #define MEGA_SOFT_SPI 0
// change to:
//   #define MEGA_SOFT_SPI 1
// This is NOT required if using an SD card breakout interfaced
// directly to the SPI bus of the Mega (pins 50-53), or if using
// a non-Mega, Uno-style board.

#include <Adafruit_VC0706.h>
#include <SPI.h>
#include <SD.h>

// comment out this line if using Arduino V23 or earlier
#include <SoftwareSerial.h>

// uncomment this line if using Arduino V23 or earlier
// #include <NewSoftSerial.h>

// SD card chip select line varies among boards/shields:
// Adafruit SD shields and modules: pin 10
// Arduino Ethernet shield: pin 4
// Sparkfun SD shield: pin 8
// Arduino Mega w/hardware SPI: pin 53
// Teensy 2.0: pin 0
// Teensy++ 2.0: pin 20
#define chipSelect 10

// Pins for camera connection are configurable.
// With the Arduino Uno, etc., most pins can be used, except for
// those already in use for the SD card (10 through 13 plus
// chipSelect, if other than pin 10).
// With the Arduino Mega, the choices are a bit more involved:
// 1) You can still use SoftwareSerial and connect the camera to
//    a variety of pins...BUT the selection is limited.  The TX
//    pin from the camera (RX on the Arduino, and the first
//    argument to SoftwareSerial()) MUST be one of: 62, 63, 64,
//    65, 66, 67, 68, or 69.  If MEGA_SOFT_SPI is set (and using
//    a conventional Arduino SD shield), pins 50, 51, 52 and 53
//    are also available.  The RX pin from the camera (TX on
//    Arduino, second argument to SoftwareSerial()) can be any
//    pin, again excepting those used by the SD card.
// 2) You can use any of the additional three hardware UARTs on
//    the Mega board (labeled as RX1/TX1, RX2/TX2, RX3,TX3),
//    but must specifically use the two pins defined by that
//    UART; they are not configurable.  In this case, pass the
//    desired Serial object (rather than a SoftwareSerial
//    object) to the VC0706 constructor.

// Using SoftwareSerial (Arduino 1.0+) or NewSoftSerial (Arduino 0023 & prior):
#if ARDUINO >= 100
// On Uno: camera TX connected to pin 2, camera RX to pin 3:
SoftwareSerial cameraconnection = SoftwareSerial(2, 3);
// On Mega: camera TX connected to pin 69 (A15), camera RX to pin 3:
//SoftwareSerial cameraconnection = SoftwareSerial(69, 3);
#else
NewSoftSerial cameraconnection = NewSoftSerial(2, 3);
#endif

Adafruit_VC0706 cam = Adafruit_VC0706(&cameraconnection);

// Using hardware serial on Mega: camera TX conn. to RX1,
// camera RX to TX1, no SoftwareSerial object is required:
//Adafruit_VC0706 cam = Adafruit_VC0706(&Serial1);

void setup() {

  // When using hardware SPI, the SS pin MUST be set to an
  // output (even if not connected or used).  If left as a
  // floating input w/SPI on, this can cause lockuppage.
#if !defined(SOFTWARE_SPI)
#if defined(__AVR_ATmega1280__) || defined(__AVR_ATmega2560__)
  if(chipSelect != 53) pinMode(53, OUTPUT); // SS on Mega
#else
  if(chipSelect != 10) pinMode(10, OUTPUT); // SS on Uno, etc.
#endif
#endif

  Serial.begin(9600);
  Serial.println("VC0706 Camera snapshot test");

  // see if the card is present and can be initialized:
  if (!SD.begin(chipSelect)) {
    Serial.println("Card failed, or not present");
    // don't do anything more:
    return;
  }

  // Try to locate the camera
  if (cam.begin()) {
    Serial.println("Camera Found:");
  } else {
    Serial.println("No camera found?");
    return;
  }
  // Print out the camera version information (optional)
  char *reply = cam.getVersion();
  if (reply == 0) {
    Serial.print("Failed to get version");
  } else {
    Serial.println("-----------------");
    Serial.print(reply);
    Serial.println("-----------------");
  }

  // Set the picture size - you can choose one of 640x480, 320x240 or 160x120
  // Remember that bigger pictures take longer to transmit!

  cam.setImageSize(VC0706_640x480);        // biggest
  //cam.setImageSize(VC0706_320x240);        // medium
  //cam.setImageSize(VC0706_160x120);          // small

  // You can read the size back from the camera (optional, but maybe useful?)
  uint8_t imgsize = cam.getImageSize();
  Serial.print("Image size: ");
  if (imgsize == VC0706_640x480) Serial.println("640x480");
  if (imgsize == VC0706_320x240) Serial.println("320x240");
  if (imgsize == VC0706_160x120) Serial.println("160x120");

  Serial.println("Snap in 3 secs...");
  delay(3000);

  if (! cam.takePicture())
    Serial.println("Failed to snap!");
  else
    Serial.println("Picture taken!");

  // Create an image with the name IMAGExx.JPG
  char filename[13];
  strcpy(filename, "IMAGE00.JPG");
  for (int i = 0; i < 100; i++) {
    filename[5] = '0' + i/10;
    filename[6] = '0' + i%10;
    // create if does not exist, do not open existing, write, sync after write
    if (! SD.exists(filename)) {
      break;
    }
  }

  // Open the file for writing
  File imgFile = SD.open(filename, FILE_WRITE);

  // Get the size of the image (frame) taken
  uint16_t jpglen = cam.frameLength();
  Serial.print("Storing ");
  Serial.print(jpglen, DEC);
  Serial.print(" byte image.");

  int32_t time = millis();
  pinMode(8, OUTPUT);
  // Read all the data up to # bytes!
  byte wCount = 0; // For counting # of writes
  while (jpglen > 0) {
    // read 32 bytes at a time;
    uint8_t *buffer;
    uint8_t bytesToRead = min(32, jpglen); // change 32 to 64 for a speedup but may not work with all setups!
    buffer = cam.readPicture(bytesToRead);
    imgFile.write(buffer, bytesToRead);
    if(++wCount >= 64) { // Every 2K, give a little feedback so it doesn't appear locked up
      Serial.print('.');
      wCount = 0;
    }
    //Serial.print("Read ");  Serial.print(bytesToRead, DEC); Serial.println(" bytes");
    jpglen -= bytesToRead;
  }
  imgFile.close();

  time = millis() - time;
  Serial.println("done!");
  Serial.print(time); Serial.println(" ms elapsed");
}

void loop() {
}
で、これはSDカードに書き込むようになっている。
私の手持ちの、ArduinoにSDカードをつなぐ手段は、先日から愛用中の「ETHERNET SHIELD 2」に搭載されているSDカードスロットだけだから、とりあえずこれを使う。
手持ちのSDカードをETHERNET SHIELD 2に挿し、Adafruitのサイトのチュートリアルを参考に回路をブレッドボードに組む。

注意する点は2つだ。
- サンプルスケッチをよく読むと、普通のSDカードは10番ピンを使うが、ETHERNET SHIELD 2を使う場合は4番ピンにつながる。なので、サンプルスケッチの中の「#define chipSelect 10」というところを「#define chipSelect 4」に書き換えなければならない。
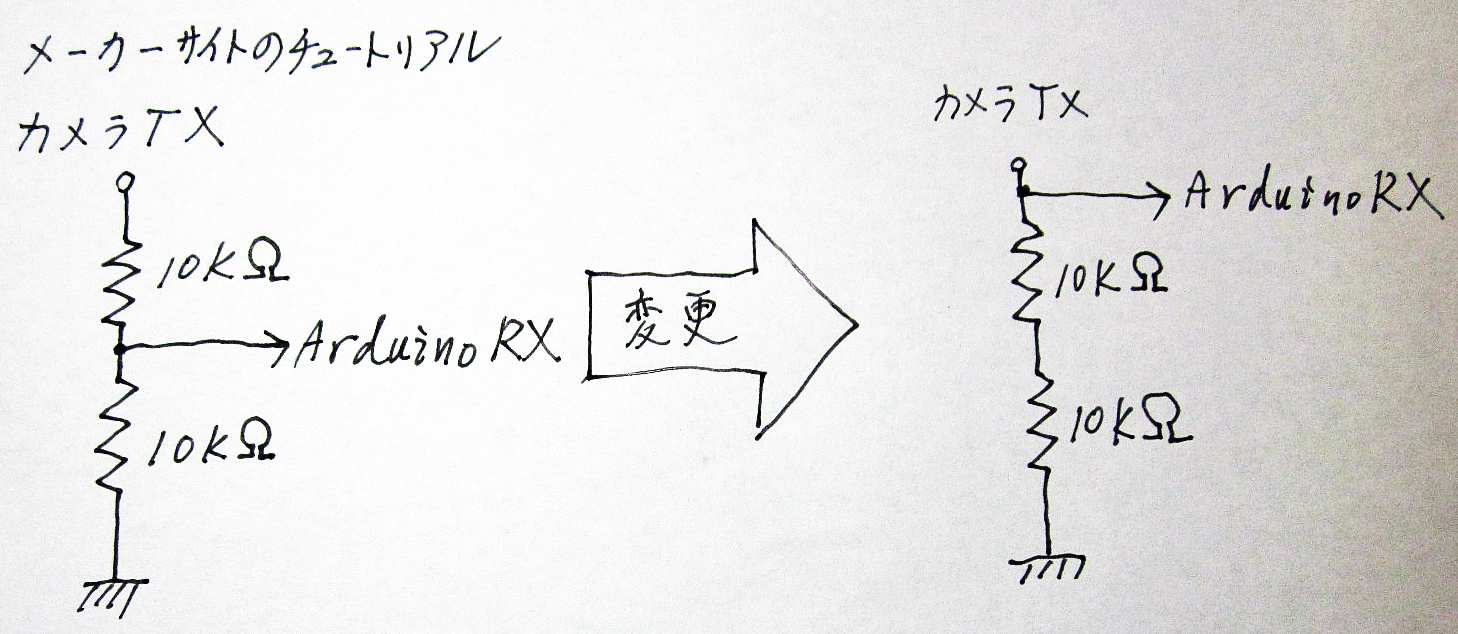
- メーカーサイトのチュートリアルでは、カメラに添付の10kΩの抵抗をTXの次に直列に二つ入れて、1本目と2本目の間からTXをとり、それをアースしているが、どうもこれだとうまく行かなかった。多分、このチュートリアルは給電が5Vだからだと思う。そこで、アースはそのままに、1本目の手前でTXをとるとうまくいった。

そうやってArduinoをスタートさせると、写真が1枚だけ撮れる。
下は、そうやって撮った私の顔である。

……むっちゃむさくるしいなあw。
同じカメラをmbedで使いたいのですがどのようにれすばよろしいでしょうか?変更するべきプログラミングの箇所や
注意すべき点などおしえてもらえうとうれしいです。
申し訳ありません、私はmbedを使用したことがなく、詳しいことを知りません。お力になれず残念です。
しかし、このカメラは、結局のところ「シリアル接続」です。シリアルで通信することを掘り下げると、どうにかなるのではないでしょうか。
いきなり質問をして申し訳ありませんでした。回答ありがとうございました。
もっと深く調べてみたいと思います。ありがとうございます。